I’ve been spinning a lot in the last few weeks to try and stock up for an exciting little event that I’ll be vending at next month.The wonderful Queen of Purls shop hosts a fundraising yarn mini-market every year to raise money for The Big Issue, and I’m looking forward it.
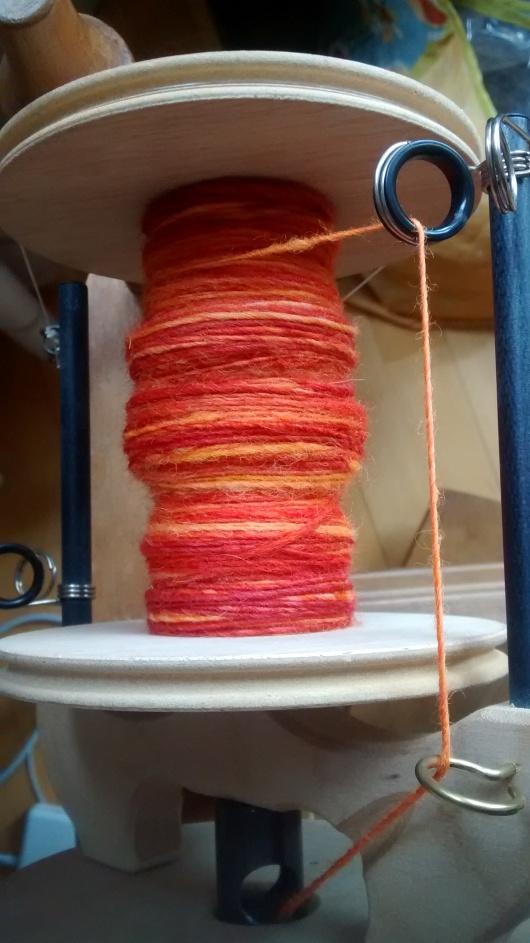
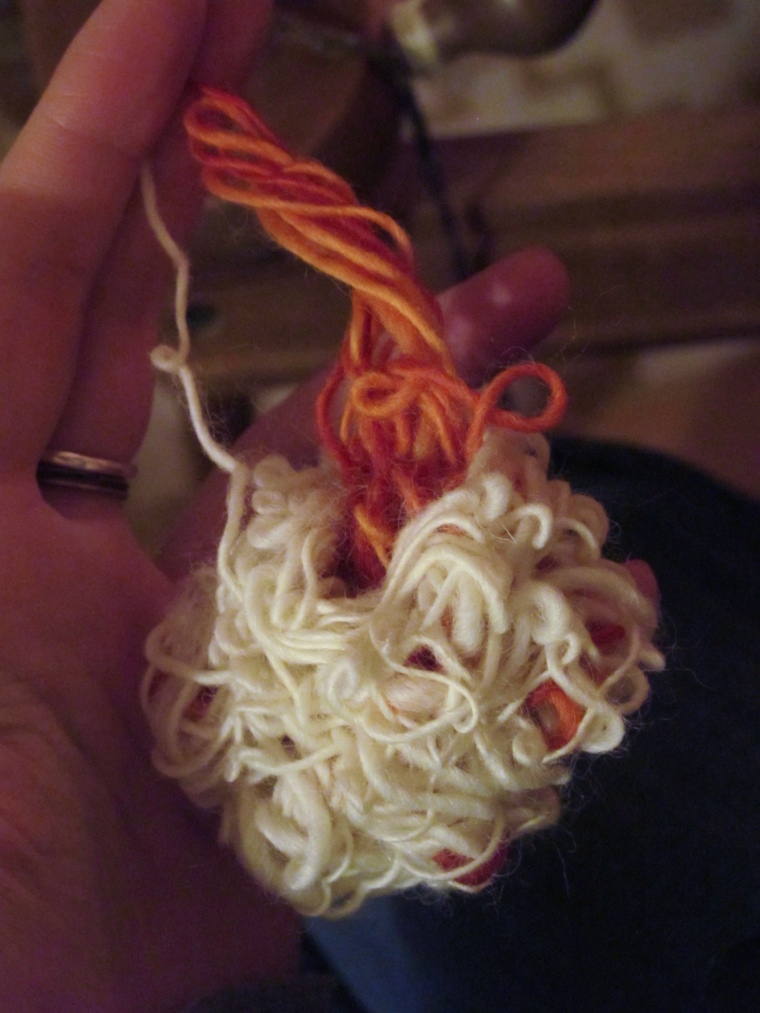
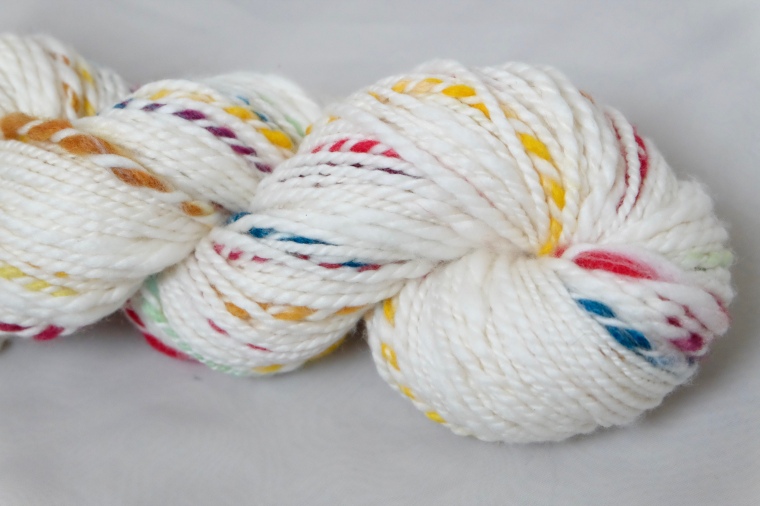
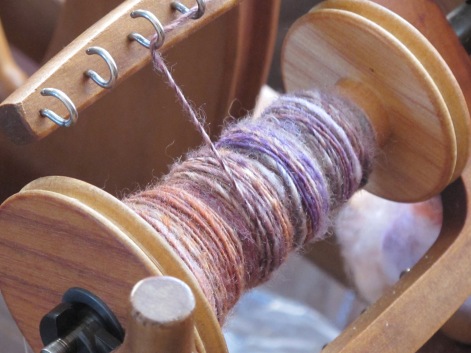
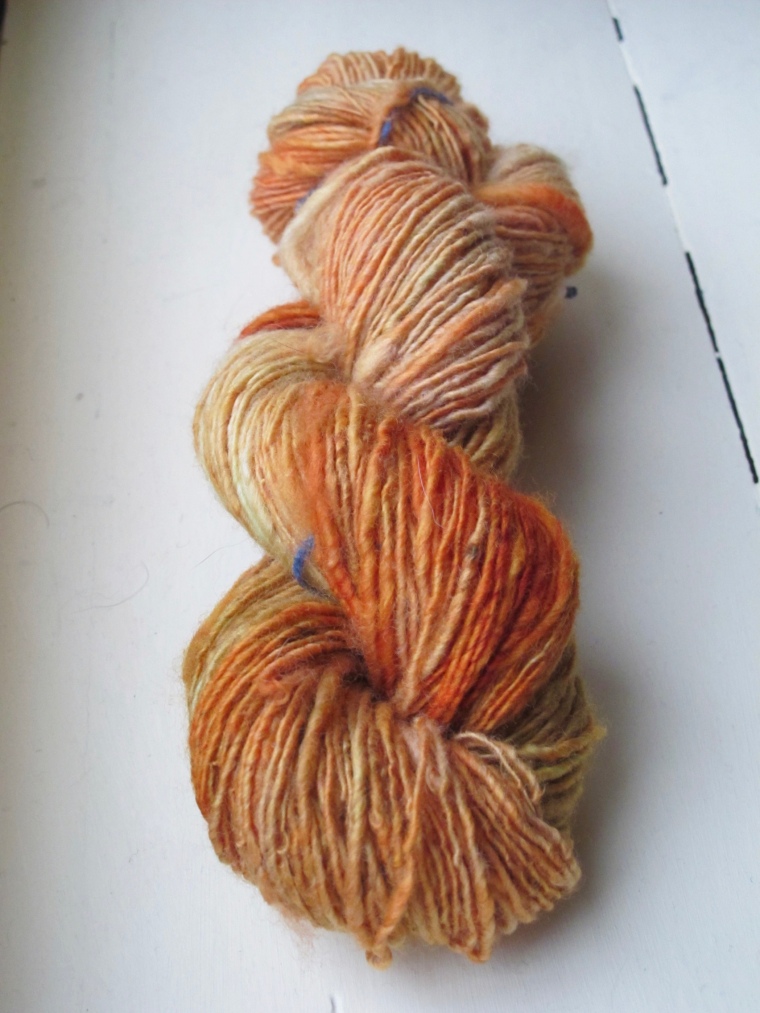
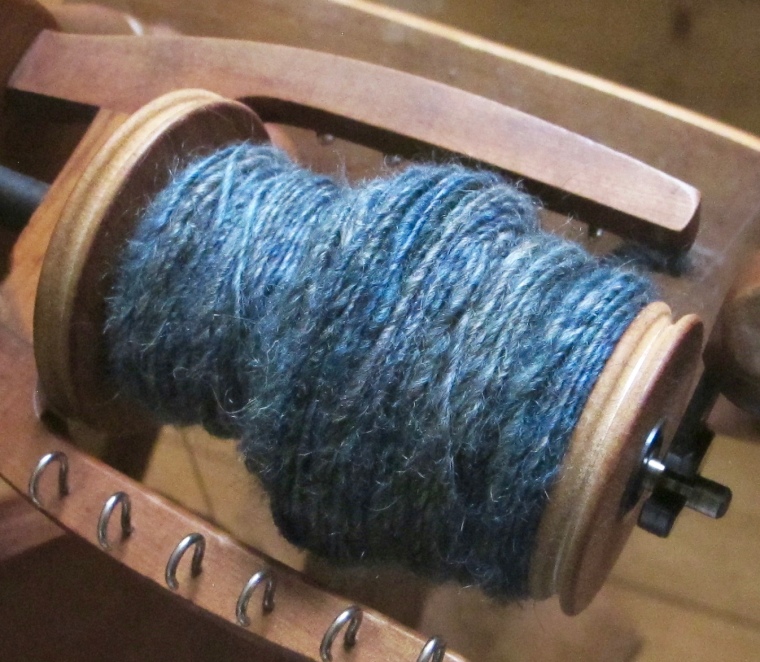
Anyways, as part of my prep for this I dyed up a nice BFL top in reds and oranges and spun it up as a single to be self striping with sections of un-dyed wool.I was planning on doing a chain ply for bold long stripes.
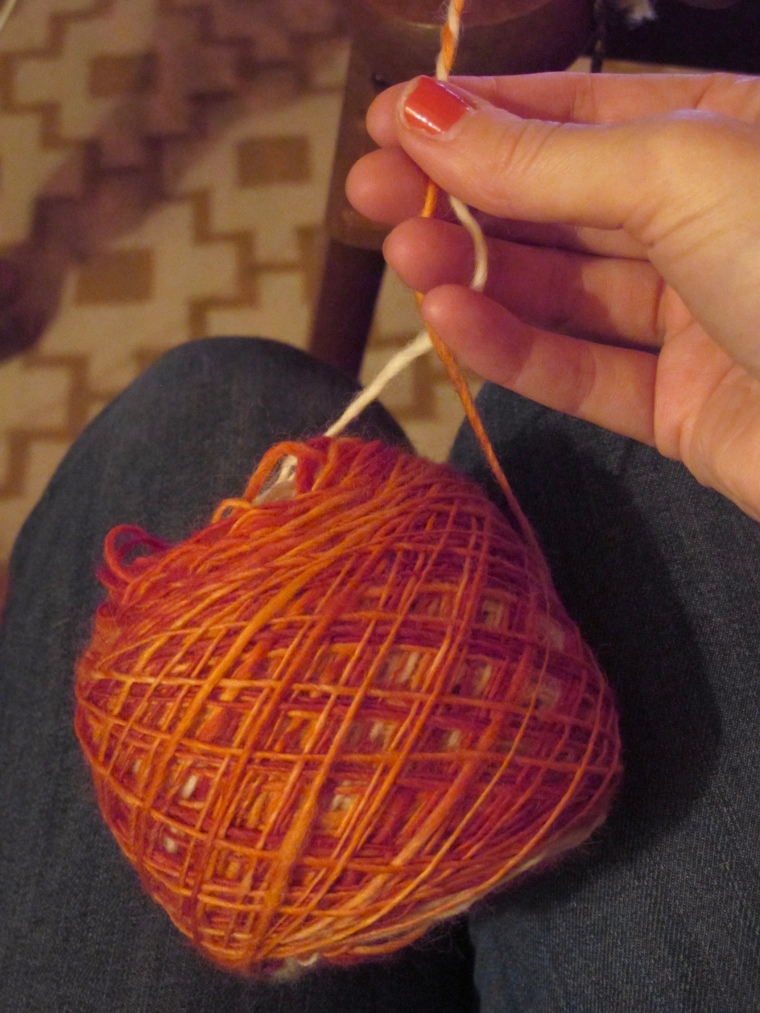
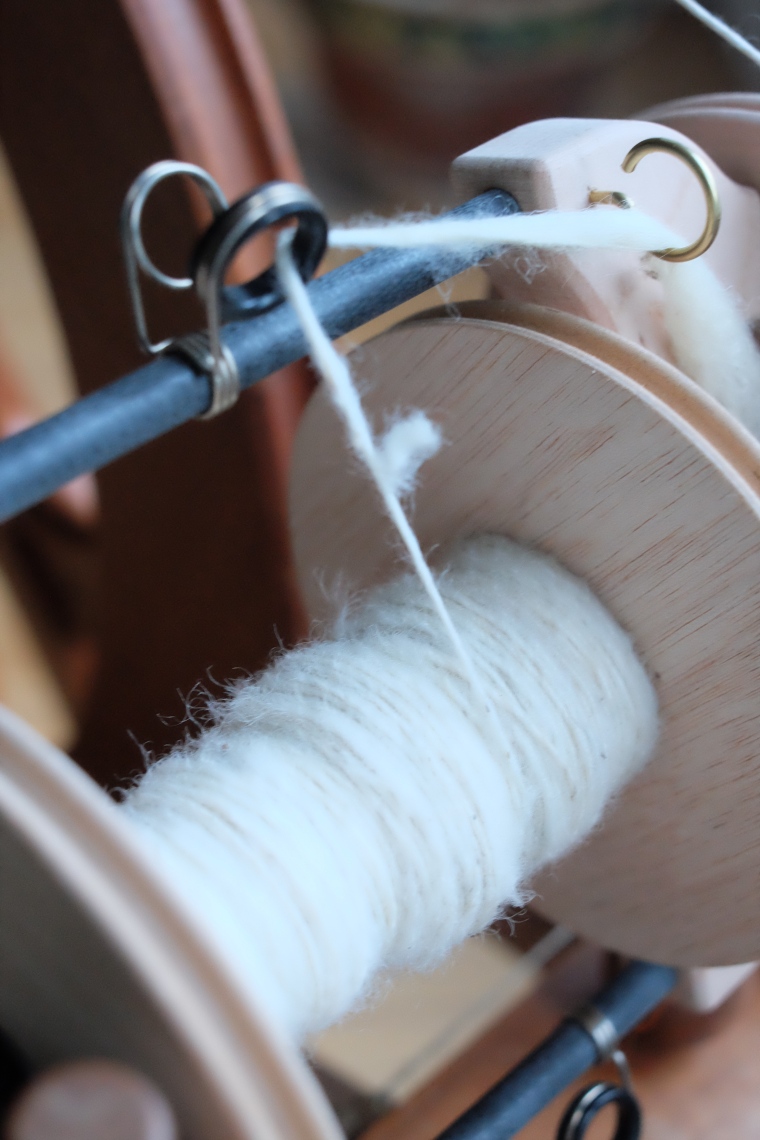
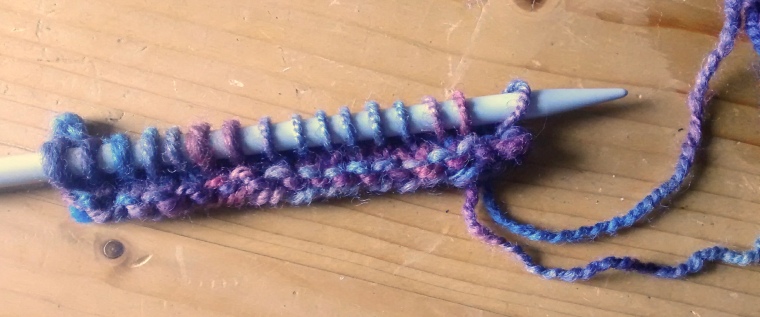
Here it is as a single in early stages of spinning:
This batch of BFL wool is super fine and is silky soft and it felt wonderful on the hands.
Something possessed me to try something new this time, and I decided to forgo the chain ply and try a centre-pull ply instead.I’ve never done this before, but I’ve been getting a bit tired of regular plying, which is quite boring sometimes, so I thought I’d give it a go.
Here’s how it works:
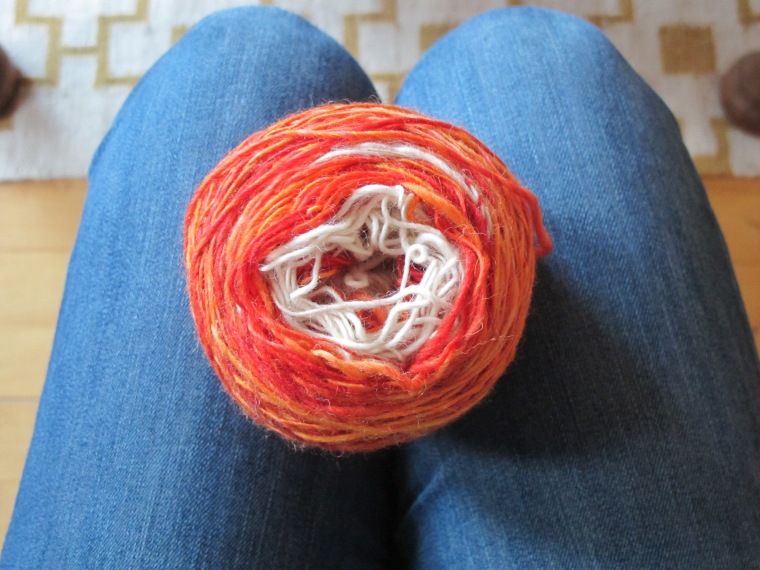
Wind the single off of the bobbin into a lovely cake.
Here the pictures become not as nice because evening fell and the light wasn’t as good.
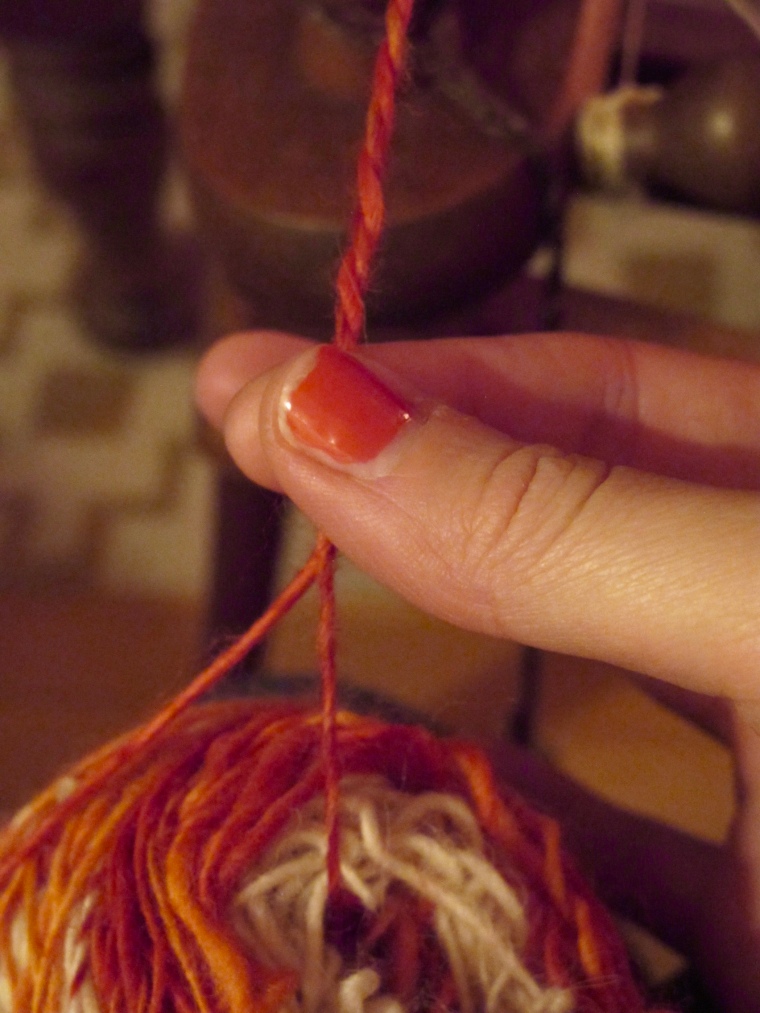
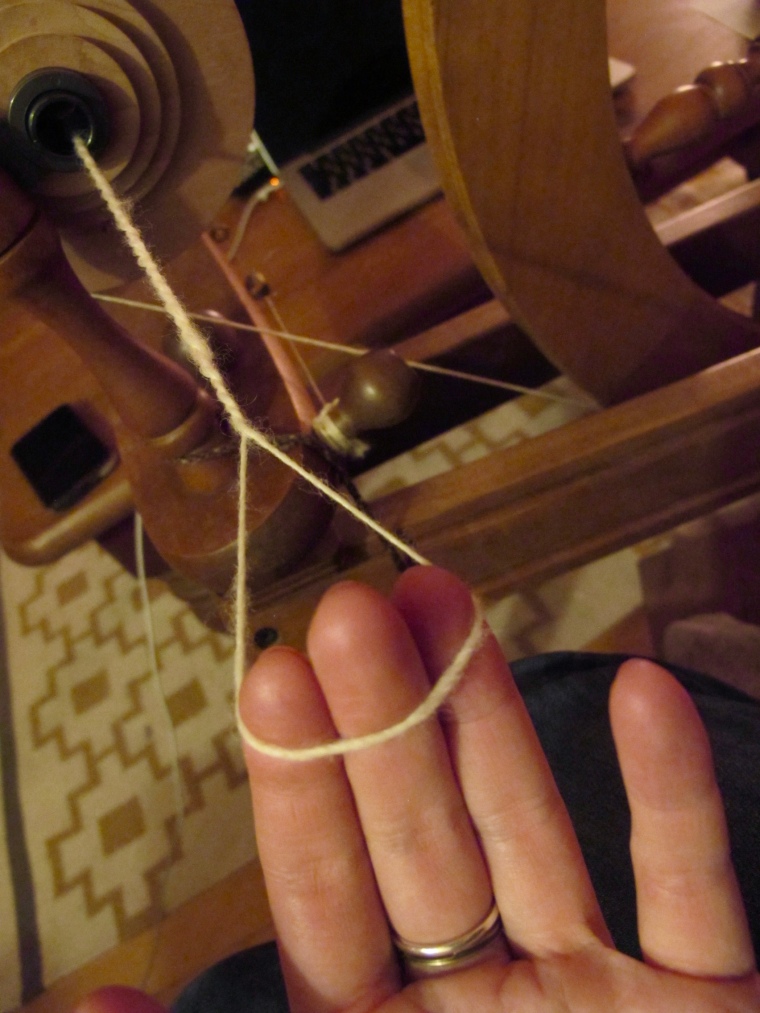
Find the two ends of the single, one from the middle of the cake, one from the outside.
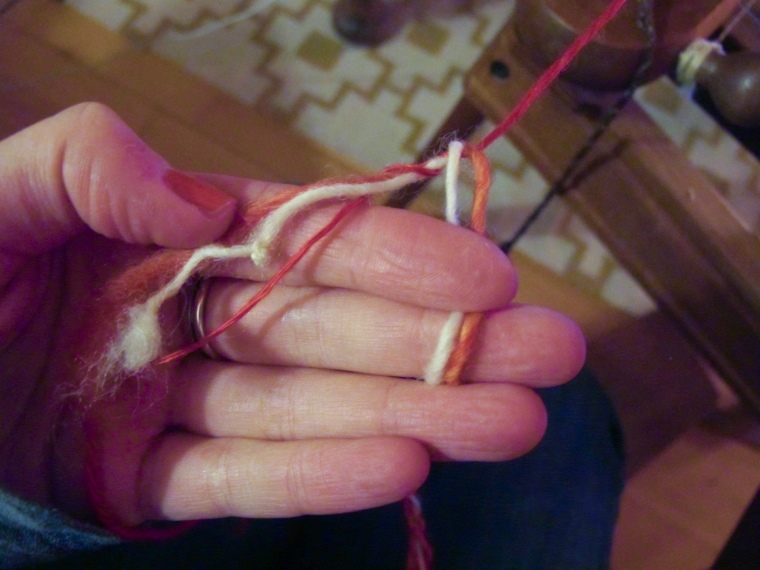
Attach them onto your leader yarn and draw them onto your bobbin. Unfortunately my leader yarn in this case was also red, which doesn’t make for a super clear picture. I know that some people tie the ends onto the leader for both this method of plying and for chain plying.I’ve never done that because I like being able to pull the yarn off of the leader yarn when I’m winding it off, so I just twisted the two single ends and the leader yarn together, like I do for a chain ply.
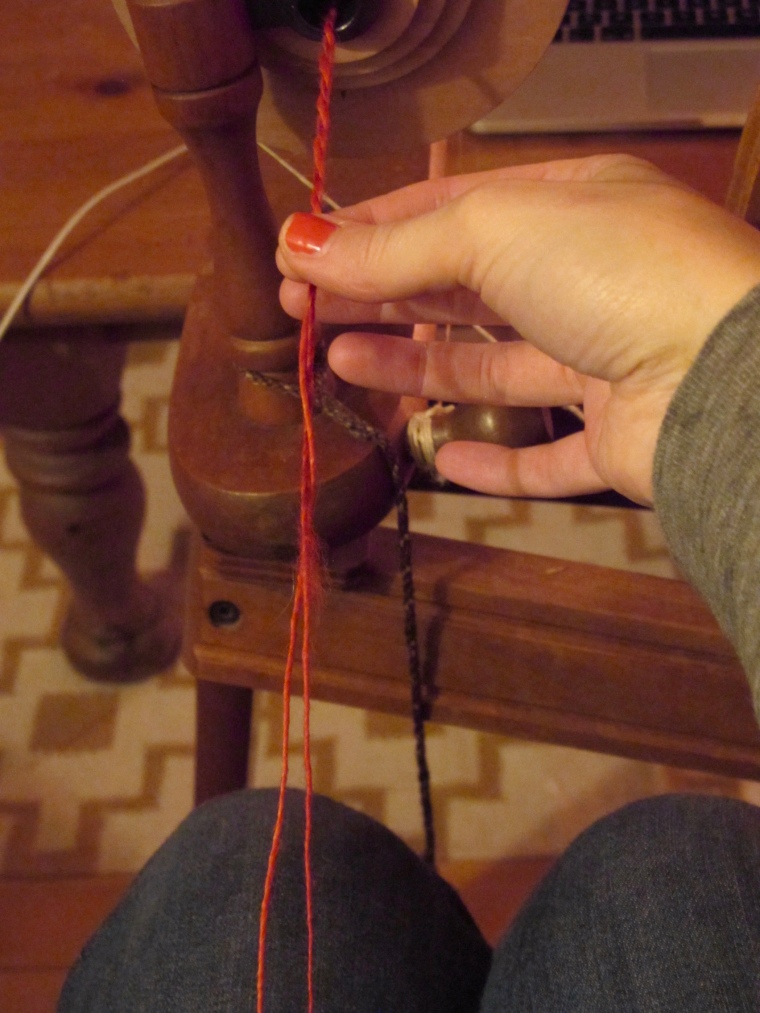
At first I kept a finger between the two single strands asI started to ply.
But I quickly switched to pinching together, pulling it out…
and then letting it draw in after I had a good twist.I held the cake in my other hand.
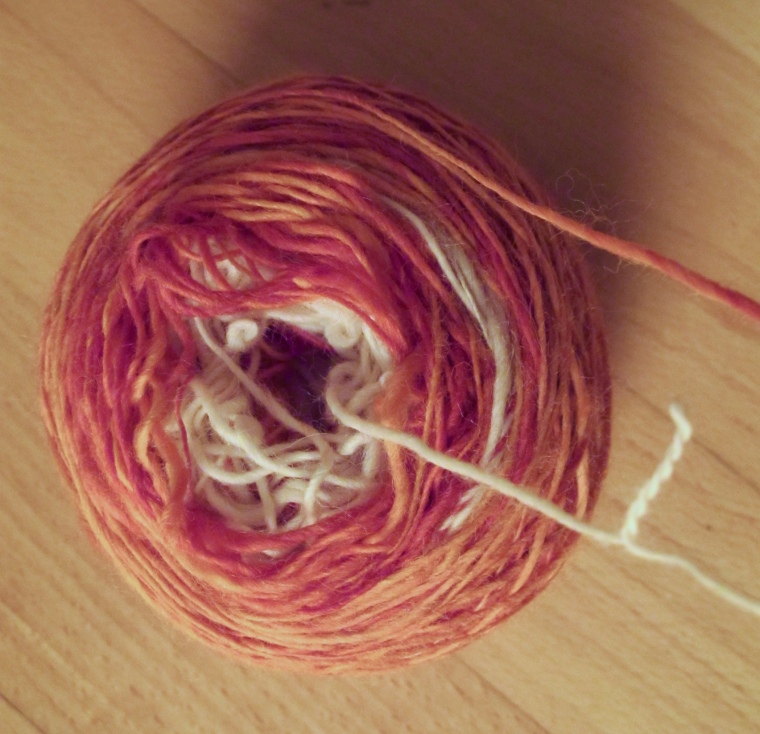
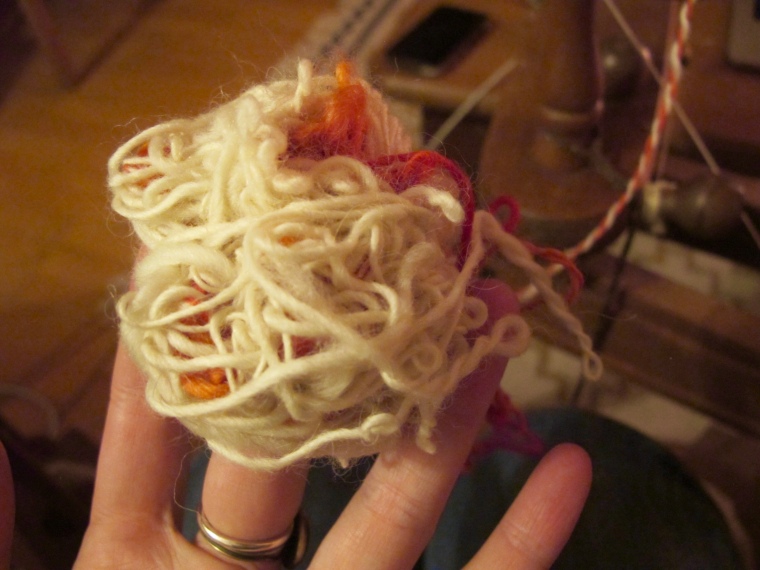
It went very smoothly, although I got a little worried towards the end of the cake when it started to collapse and look like this:
And then this unsightly mess started to happen:
But miraculously it worked and I ended up with a perfect loop, coming together in the end.
So….
What did I think of this plying method?
Well, it takes different planning and working out how the colours in the single will ply together.Also the mess towards the end could have gone very wrong.
However, I really love holding the cake in my hands as I ply, it makes plying as tactile as spinning, and makes the whole process feel more intuitive and gentle.It was also very efficient.Usually for a two ply yarn I divide the wool in half and spin it onto two different bobbins, then ply it off of my Lazy Kate.I never get the proportions right though and always end up with a little bit of waste on one of the bobbins.This usually is spun onto an ever-growing bobbin of odd ends of un-used bits that will some day become a huge mishmash skein.Plying from the centre pull means that you use up all the yarn and it comes together perfectly at the end.I will definitely use this when plying un-dyed singles that will be dyed after plying.
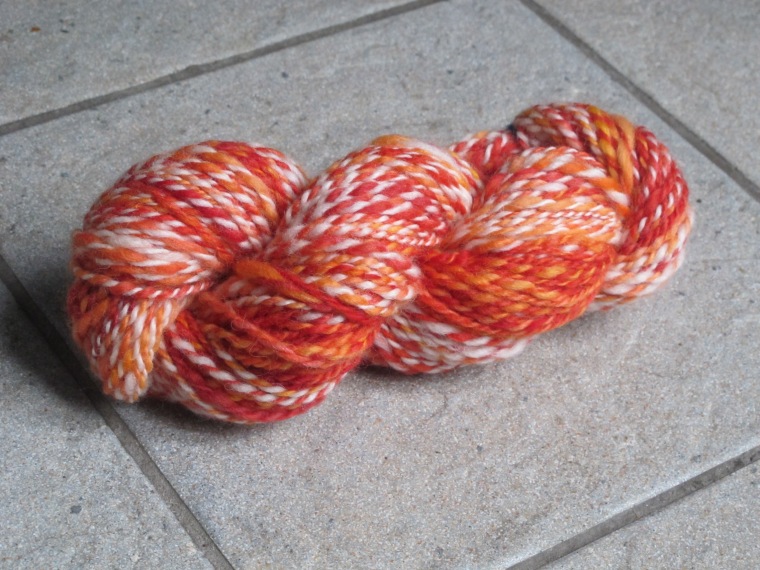
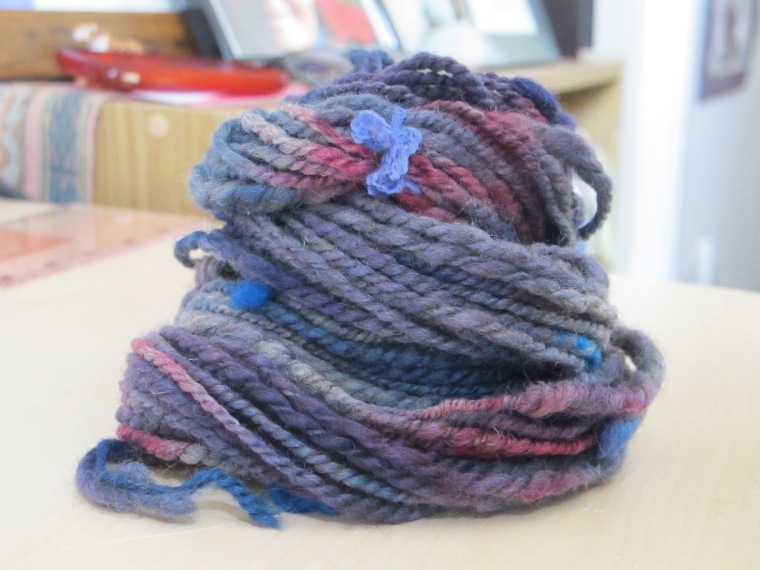
Here is the finished yarn, by the way.The colour inspiration was first frost on my old local park in my home-town, when the red and orange maple leaves shine frozen in the morning sun.I do miss autumn in Ontario.
I thought I should get around to sharing some pics of things that people have made with my yarn. I first got in to spinning because I wanted to make yarn for myself to knit with. But selling the occasional skein on Etsy means that I get to see my yarn in other people’s creations, which is a true pleasure. Anyone who has tried spinning will know the effort and care that goes into a single skein of yarn. I always feel attached to every thing that I make, and it’s exciting to see what people make with my little yarn babies once they have flown the proverbial nest! Looking through some of the things that others have made has turned into a nice little retrospective of some of my favourite spins over the last year and a half.
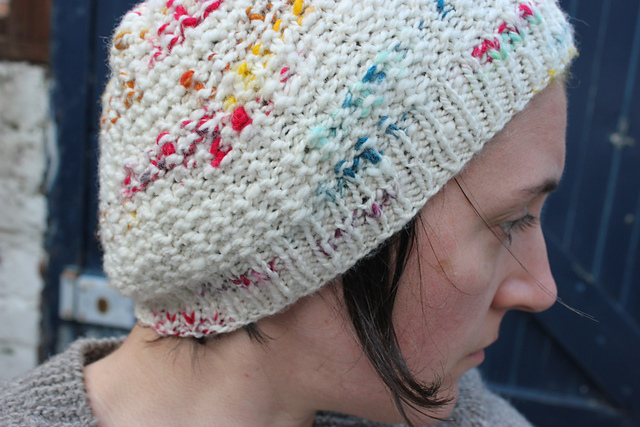
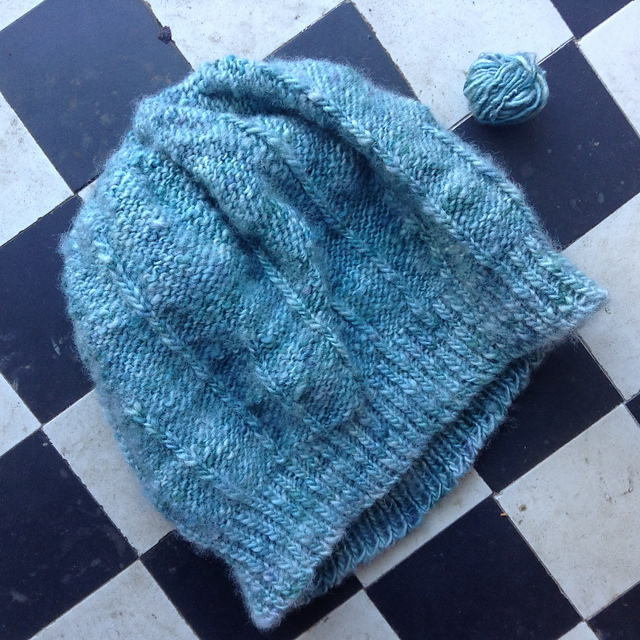
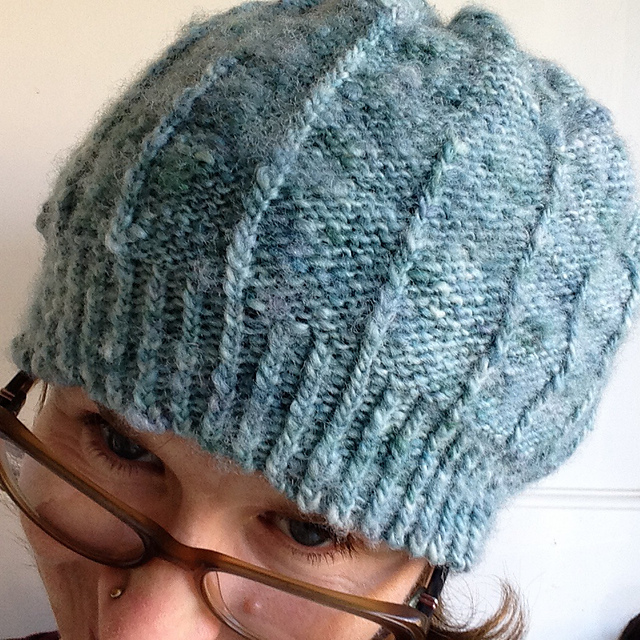
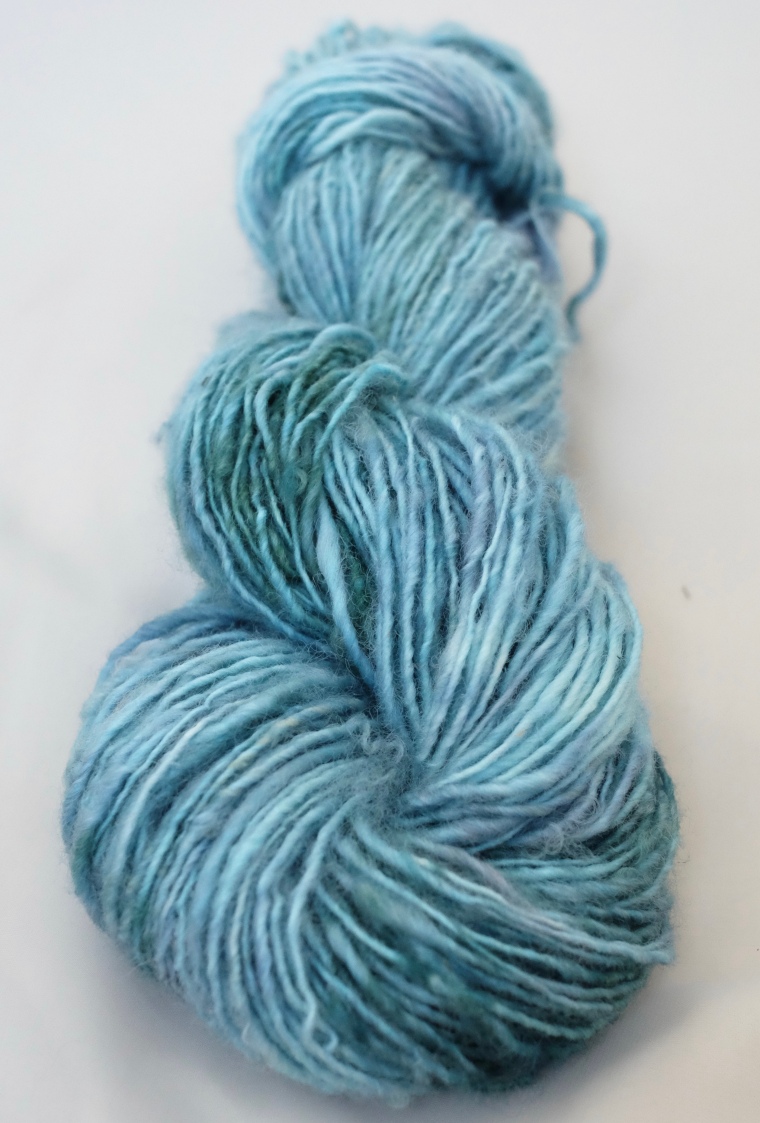
To start, let’s go back to ages ago with this skein, and this awesome hat:
Undyed Falkland wool with sections of merino fleece
This skein was my first time spinning Falkland wool. I stumbled across it by accident while trying to be restrained in the pick and mix section of the World of Wool warehouse in Huddersfield. It’s an incredibly soft and silky wool with an almost pearly sheen. It’s also a good alternative to other imported merino, as it’s always non-mulesed and on the Falklands the sheep are farmed sustainably in terms of land usage and pesticide levels.
And above is the skein, come to life and on the head of the beautiful Sylvie from Phileas Yarns . It’s a lovely use of handspun texture and the yarn knitted up exactly the way I’d hoped it would.
Jumping ahead in time, this past summer, I vended at the Indie Burgh Yarn Crawl pop-up market in Edinburgh, where I sold tons of handspun and met lots of lovely yarn people, including Helen who was a tourist from Arizona. She bought this:
A month after the IBYC, Helen found me on Facebook and sent me this picture:
It’s combined with Ginger’s Hand-Dyed from the Ginger Twist Studio. I couldn’t find Helen on Ravelry or Instagram, and don’t want to credit her using her personal Facebook, so Helen, if you’re out there and see this, feel free to claim credit for your lovely work!
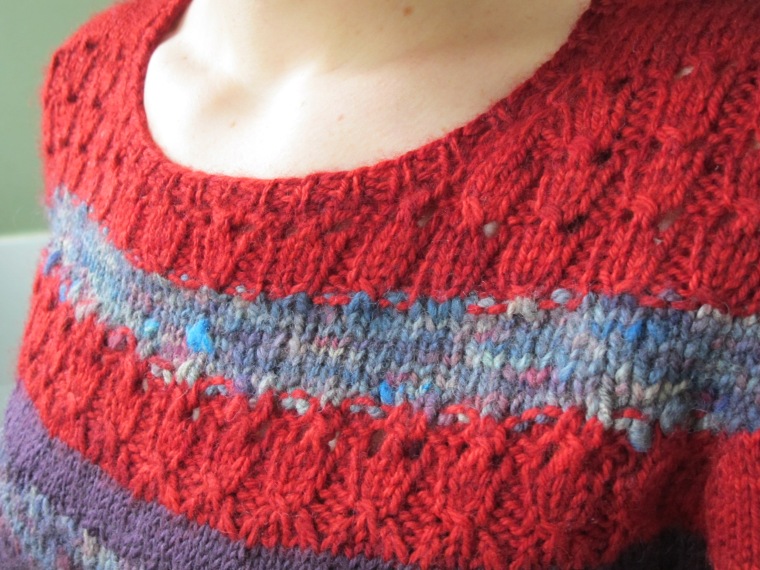
And speaking of Helens, there is this hat:
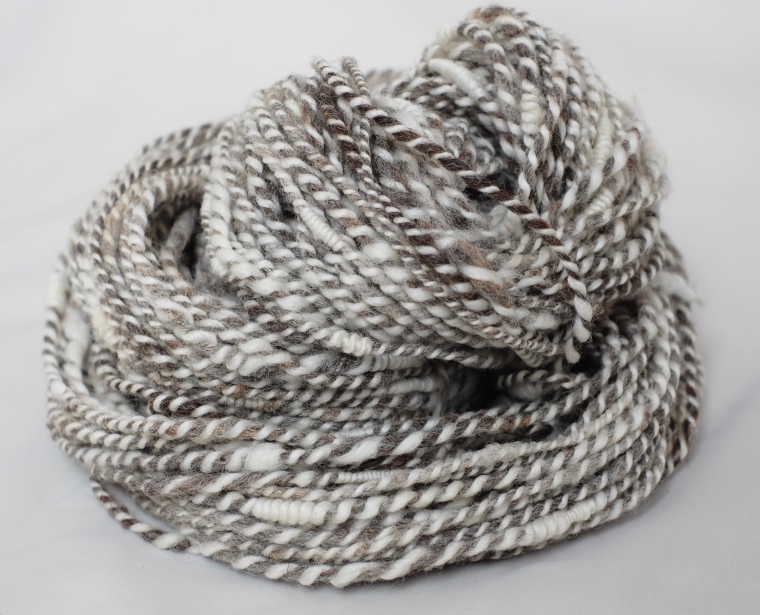
This Helen from my old knitting group in Yorkshire is prolific in churning out beautiful knitting projects. This hat was made from this skein:
This yarn was an all-time favourite of mine. It was a spun-from-the-fold single from Clive’s merino fleece. I think it’s important to know where our fibre comes from, and skeins like this remind me of this. Spinning from the fold incorporates all the little slubs and felty bits that are natural to an outdoor animal’s life. Looking back through my photos, I found some pictures of this skein being spun.
Such lovely slubby-ness
I spun a similar skein for myself and knit it into a shawl, which I’ve talked about it in a previous post.
I like to think that Clive, the happy, chubby sheep that I first met in a paddock in Australia is not contributing to hand-made hats and scarves in the UK and USA. It makes the specialness of a hand-made item seem just a bit more personal.
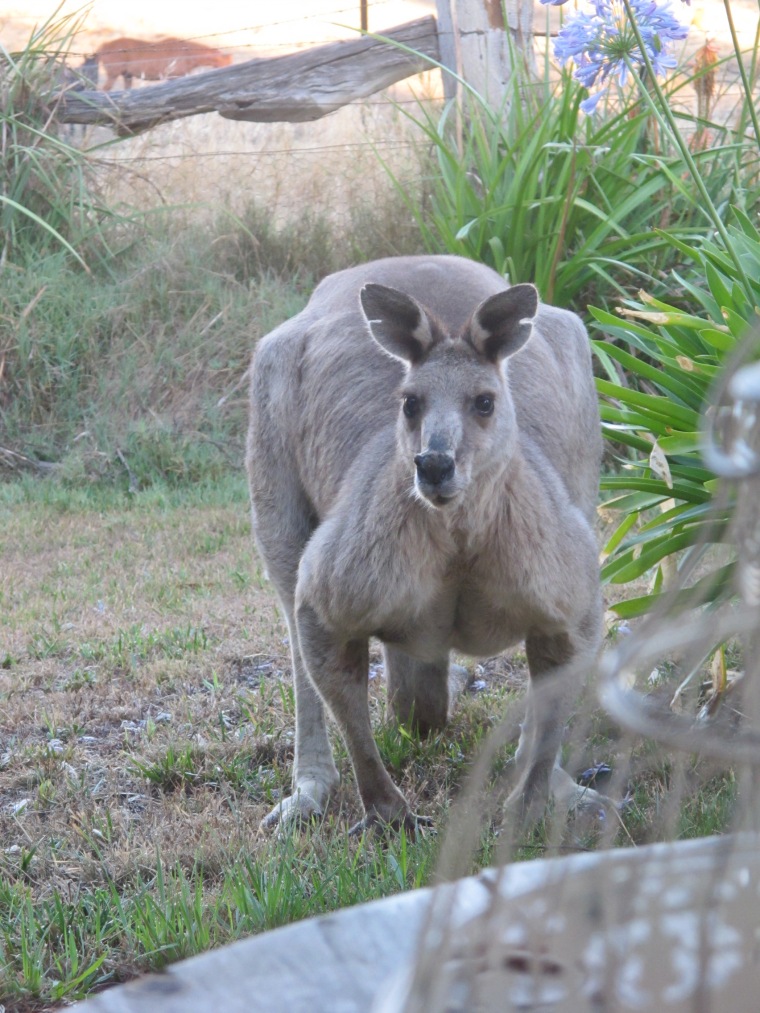
Having waxed poetic about this sheep, I realise that I have absolutely no photos of him. So I’ll close this post with this photo:
This is a really big kangaroo who sometimes hangs out in the same paddock. I have a million photos of him
A lot of things have been happening in my little spinning and yarn world over the last few months. The biggest one, for me personally at least, is that I got more focussed about my colours.
When you sell on Etsy, you receive a lot of tips about improving your shop and there is a lot of talk about branding, which is something that is foreign and which I’d rather not think about. But then I discovered a really beautiful brand of hand-dyed yarns from Canada. I came across them by accident through a knitter whom I follow on Instagram and I was inspired by their colours and the simple elegance of their land and sea colour inspiration. They’re called Lichen and Lace and at some point I will treat myself to a lot of their yarn.
This got me thinking about what really inspires my colours. Since my yarns are all one-offs, my dyeing until now was usually a case of throwing around colours in whatever way I fancied. I named my yarns after towns and places, but my associations were sometimes loose and after the fact. So I decided to get back to basics and think about what has always inspired me.
Spinning my first landscape yarn, which is now in the stash of my dear friend Ashley, mitten knitter extraordinaire.
I’ve always gotten a bit annoyed at people who turn crafts into long-winded academic exercises. I don’t think that dyeing or spinning are academic and I’m not trying to swing things in that direction. However, sometimes it’s nice to make the simple act of adding dye to wool into something a bit more personal.
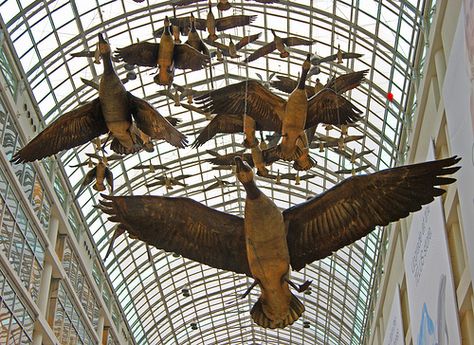
Back in my previous life as an experimental film student I was inspired by the wonderful Canadian artist Joyce Wieland.
Joyce Wieland “Reason Over Passion” film still, 1968
I loved her for so many reasons: her take on feminism, her promotion of traditional crafts, her Canadian patriotism… But more relevantly, she talked about landscape and how Canadians are affected by their sense of landscape.
Joyce’s and Michael Snow’s geese still fly in the Toronto Eaton Centre.
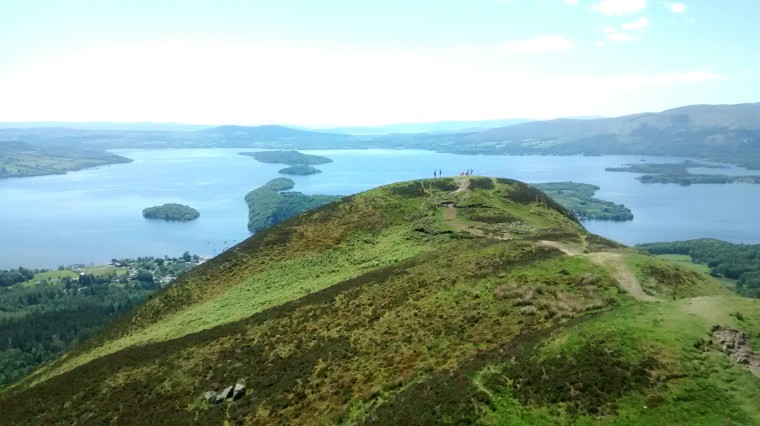
So to get back to yarn: I decided to refocus all my dying and colours on landscapes. And since I live in Scotland, where beautiful landscape, both urban and rural, is abundant, this has not proved to be a problem.
Scotland, you are just so amazingly beautiful. I took this at the top of Conic Hill, overlooking Loch Lomond
Above are early morning chimney pots from the window of the flat I stayed in the first time I came to Glasgow a few years ago. Beside is its corresponding yarn, a thread-plied thick and thin merino.
Below is a lovely street in Barcelona where I stayed last month, making me want to dye everything blue, pink and green (although you can’t see the lovely green building in this photo).
I’ve started saving pictures of landscape inspiration, and I found that I’ve started to enjoy dyeing more because I’m actually aiming for specific results. I don’t know how much people who buy yarn care about where the inspiration for colours comes from, but for me, it makes it more enjoyable.
It’s about time I continued my posts about knitting with handspun yarn, especially now that my lovely Etsy shop (check it out here) is up and running and people are actually buying my yarn to knit with. In my first post about knitting with handspun (Knitting with Handspun Part 1: Beginnings and Pullovers) I covered some of my earlier handspun knitting adventures. This time I’m going to focus specifically on some shawls that I’ve made with my yarn and what I’ve learned along the way.
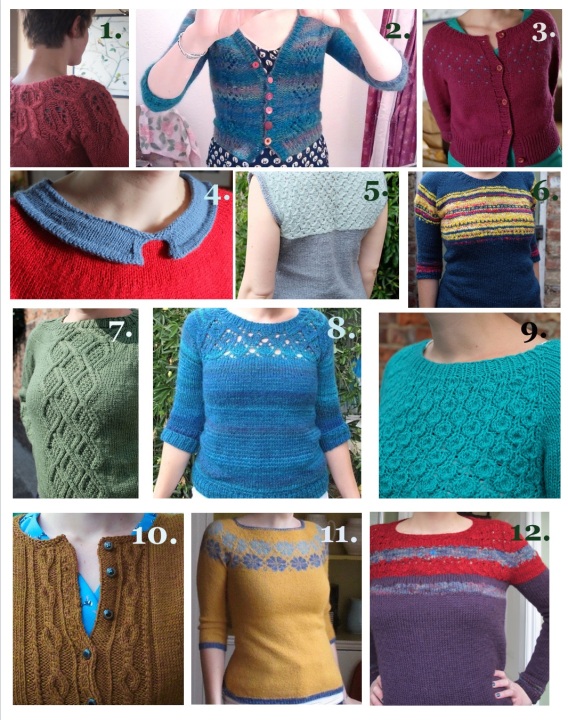
First of all, I have to confess that I am predominantly a sweater knitter. It would seem that knitters fall into categories of what they like to knit the best: sock knitter, mitten knitter, shawl knitter, sweater knitter. I’m definitely the latter. I love knitting sweaters and do that the most. Accessories are usually in-between projects to me, to break up the time that goes into knitting a complete sweater.
I may be a bit mad, but in 2015 I knit 12 sweaters. Numbers 6 and 12 are handspun ones that I posted about previously.
Having said that, I have loved pretty much every sock, mitten, slipper, hat and shawl project that I’ve done. Also, shawls are a lovely way to show off beautiful yarns without using large quantities. A lovely handspun skein combined with other nice yarns makes a beautiful shawl. You don’t need to worry about fit, and there are so many patterns out there for lovely striped and geometric patterns that highlight a beautiful yarn and great colour combinations.
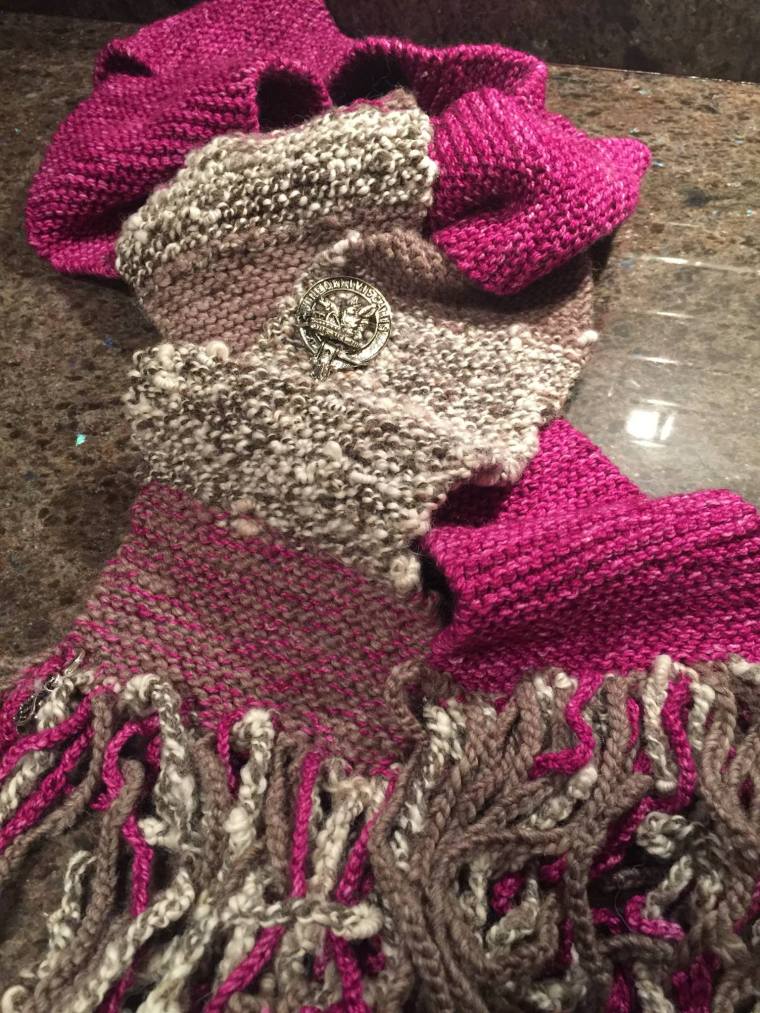
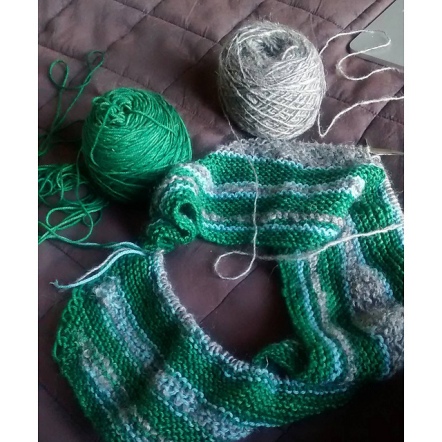
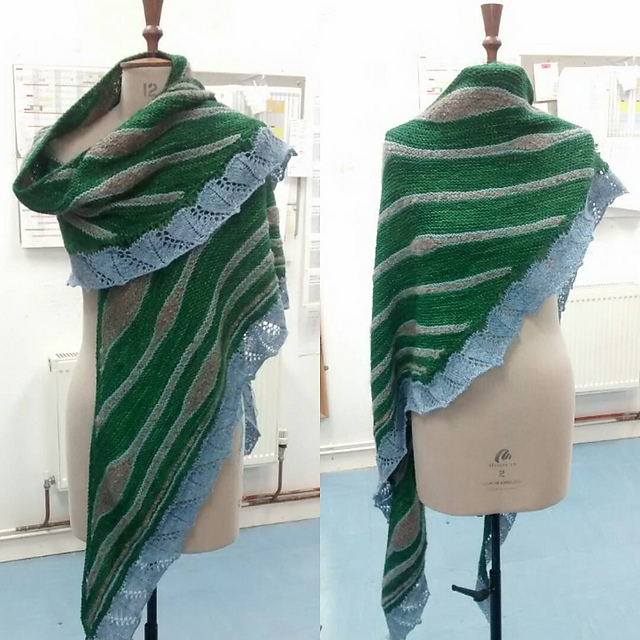
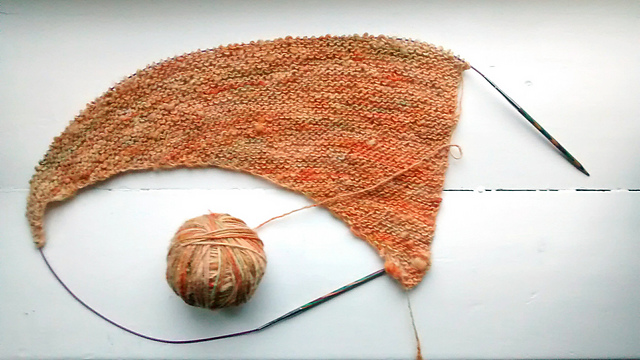
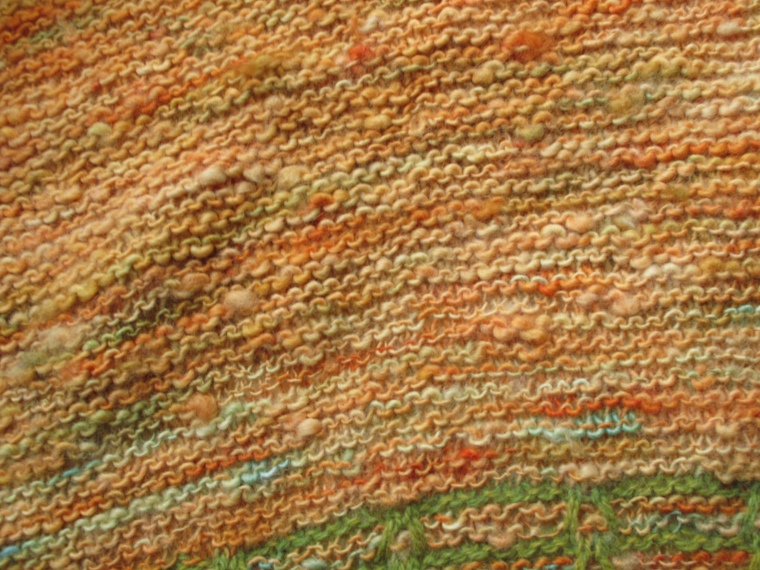
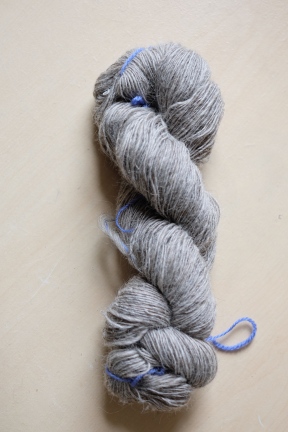
Above is the beginning shot of my most recently completed shawl; a cozy beast that I wear on almost a daily basis. I knit it using some lovely handdyed yarn that I purchased as a treat from my friend’s shop Phileas Yarns. The grey yarn is handspun that I made specifically for this project. It’s un-dyed grey Massam, spun as a single to match the gauge of the green yarn. Here it is below in its in-progress state, showing off its lovely halo and long-wool texture.
This project was great because the exact gauge of the handspun sections didn’t really matter. They were worked as short row ‘clouds’ and so the slight variation in handspun texture didn’t affect the shape of the shawl.
The finished result:
Knit from the pattern Northern Sky by Christelle Nihoul
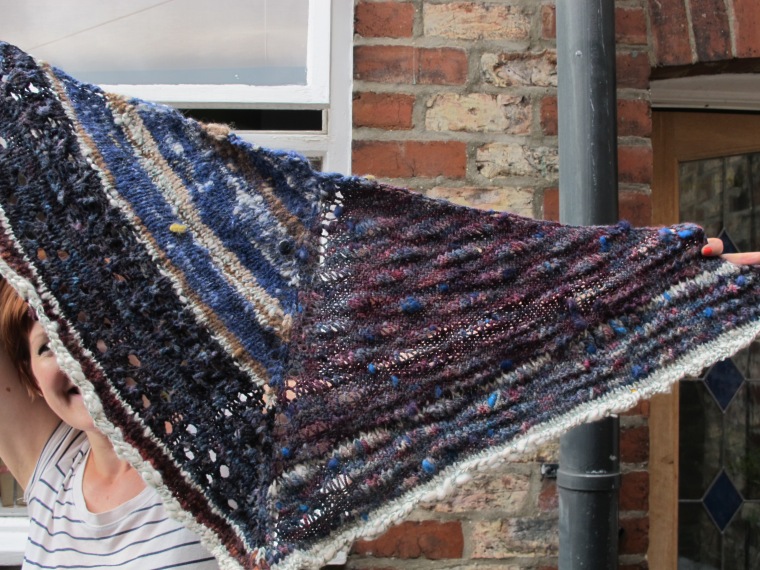
This felt like a real success, particularly in comparison with my first handspun shawl:
Behold the Transcontinental Alpaca and Three Sheep Shawl: A product of wool geekery, in which I got a thrill out of knitting with three breeds of sheep and alpaca from two continents. This was a completely handspun project and I was very excited about it. The end result was a bit crazy looking, but I was totally in love with it. I knit it from the following yarns:
Clockwise from top left: Australian alpaca blended with Canadian alpaca, dyed and undyed; thread plied, undyed merino cross; handpainted ryeland; handpainted BFL
I’ve mentioned this shawl before in a very early post about ryeland fleece ( A Weekend With The Oldest Sheep in England) Basically, the ryeland has a springy cobwebby texture, which evidently stretched during knitting and gradually retracted over the course of a few weeks, meaning that the shawl started to shrink and warp. I eventually pulled it out and learned this very important lesson, which is now my second knitting with handspun tip:
You can’t always mix fibres and yarns as if they are identical
Different yarns behave differently. Different fibres certainly behave differently. And there are a lot of different factors involved in why. In this case I took a super squishy alpaca, combined it with the springy retractable ryeland, and then added in a soft, but hardwearing BFL which had been tightly plied. The result was that while the alpaca bloomed and fluffed during blocking, the ryeland shrank, and the BFL just hung there draping beautifully, but not moving at all. The result: a warped shawl.
The solution is to gauge swatch, take little samples and block them, and be careful with how you combine very different handspun yarns in a project. The green shawl above was successful because the handspun sections could behave however they liked and it didn’t throw off the rest of the shawl. My multi-fibre handspun shawl was a triangle shawl with centre increases so that every row depended on each other and each half of the shawl was integral to the other.
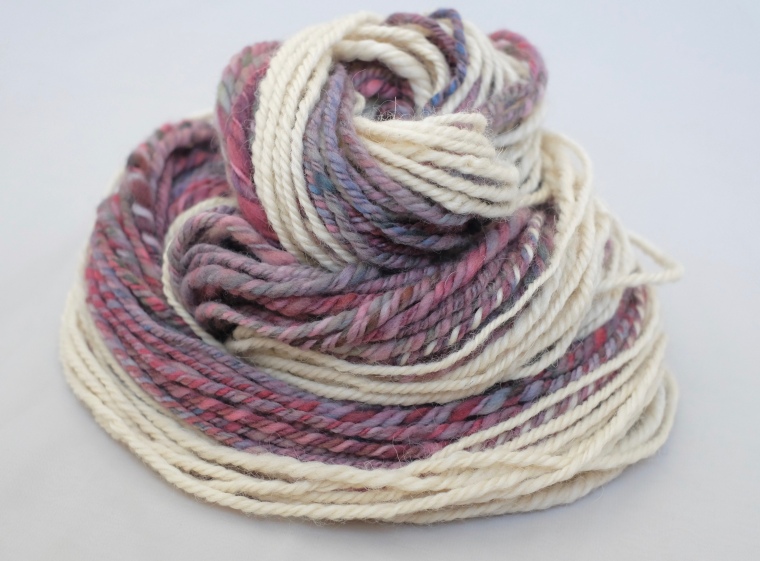
I had to think about this just yesterday when I finished up with the above skein of yarn and listed it in my shop. This is a self-striping yarn that changes back and forth between hand-dyed merino and undyed, natural cream Massam. It has a lovely combination of textures. However, knitting with it will require a good gauge swatch because of the striping between the two fibres. The merino is soft and squishy and is far more compact-able than the massam. This means that the gauge that it’s knit in will have to work for both fibres and both of them need to be swatched for. While the merino can squash down to a fluffy and tight gauge, the same tight gauge on the Massam will not drape as nicely because it won’t squish down the same way. A looser gauge that works for both and allows them to both move and drape nicely will be required.
Now on to my last handspun knitting tip:
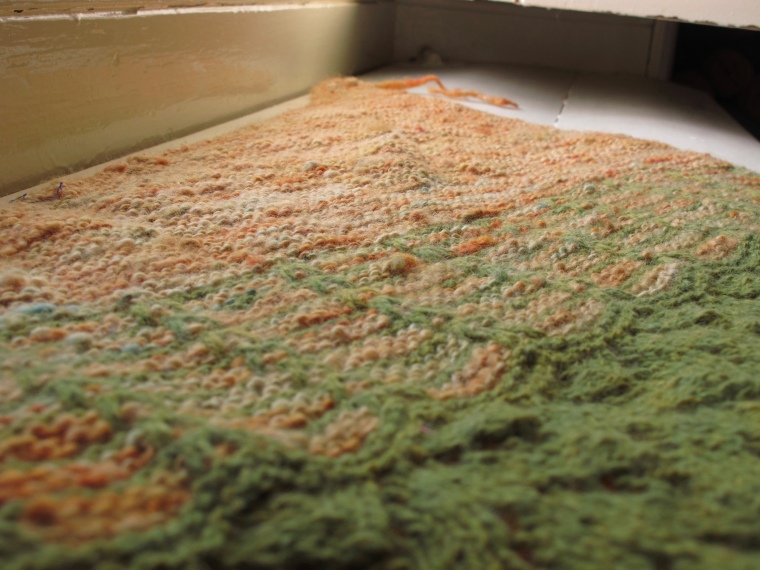
Above is an almost-complete shawl, which I’ve since decided to modify and have pulled back. I knit it from an all-time favourite handspun single which I spun from the fold with the fleece from Clive the pet sheep. This yarn was one of my first times hand-painting. I loved it so much and purchased as special skein of naturally hand-dyed camel/alpaca/merino blend to combine with it.
Handspun single from Clive, hand-painted after spinning.
I used the pattern Byatt by Karie Westermann which calls for a specific brand of yarn, 100g of each colour. I had 100g of the handspun skein and 50 g of the other one, so I thought at some point I’d spin or dye up another 50 g of contrast colour and finish it off that way. However, what I didn’t take in to account is that, unlike with most commercial yarns, you can’t really estimate how much you have by weight. I usually think to myself that 100g of fingering weight is enough for a pair of socks, 450-550g for an aran weight sweater, 300-400g for a fingering weight sweater, 200 g of anything for a shawl, etc. However with this shawl, I ran out of the handspun really really quickly, which is too bad, because it knit up really nicely.
Lovely “from the fold” texture, great colour variegation, and all in all a nice way of showcasing a raw fleece yarn. However, because I ran out so quickly, I had to completely readjust the pattern and then ended up running out of my contract colour too quickly as well, which threw everything off. My solution was to dye up another contract colour and swap it in to the pattern with my other contrast colour as soon as I ran out of handspun. The result is nice, but it’s pretty disheartening to pull back so much work. I could have avoided this if I’d actually paid attention to the yardages I had and the yardages that I needed, and had planned from the beginning.
So the last tip is:
Judge the amount you need by yardage and not by weight
This especially applies to yarn that’s been spun from the fold from raw fleece. The natural kinks and slubs that make yarn handspun from fleece so lovely can also make it heavier, meaning that you have less yardage for every 100 grams. Yarn like this has little pops of felt that give a beautiful organic texture and speak to the origin of the yarn. Fleece felts on the sheep as it rubs against things, stands in the rain, sleeps in the field, and basically lives its life outdoors. Including these felted fleece bits in the yarn feel, to me, like including a bit of the sheep’s story into the work. But you can’t underestimate how dense and heavy they can be. Commerically combed and spun yarns and some hand-carded handspun yarns can have a lot of yardage for less weight because they have a lot more air in them. Spun-from the fold yarns may have a lot more story in them, but they are much denser.
I will continue to knit with my own handspun, so more handspun knitting posts will follow in the future!
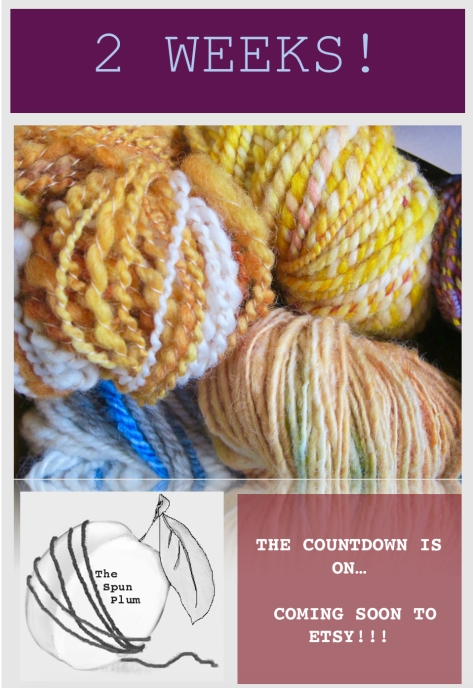
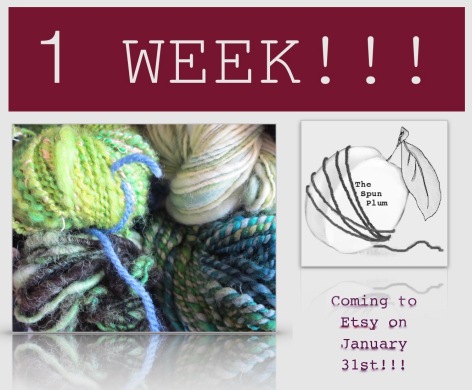
The time has come! In a week I’ll be opening an Etsy shop for my handspun yarns. Eventually I’d like to start selling hand-painted wool tops, but for now I’m going to focus on getting my yarns online and seeing how it goes. This is something that I’ve been planning for quite a while and this week I’ve been cramming to get everything done in time. I had 29 skeins to photograph and describe, business cards to order and yarn labels to design! I’ve also been trying to set up a yarn brand page on Ravelry, but that has been a bit of a slow process.
With my very limited graphic design skills I’ve been trying to hack out some countdown banners for Facebook and Instagram. I’ve been slowly gathering followers on Instagram over the last little while, but I’ve yet to see if it will be successful as a marketing tool!
I also designed my own business cards…
And yarn labels….
The labels are a tricky one because I still can’t decide if I want tie-on tags or wrap-around labels. I’m going to stick with the wrap-around ones for now, and see how they turn out.
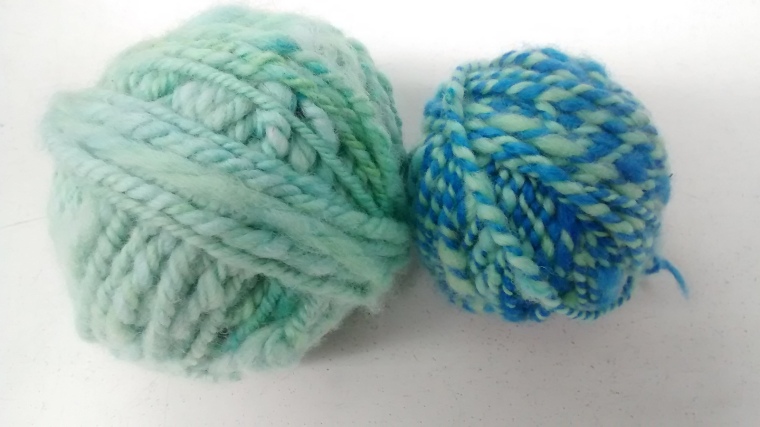
Yarn photography took place on the stairs in my house, which I discovered has fabulous natural light especially when it’s a little bit overcast, which it is most of the time. I laid out a cream sheet with grey chiffon over top and got snapping. Here are some previews…
Pricing? Agh! The problem is that handspinning is not cost-effective if worked out by hours of labour. This is especially the case when you work from raw fleece, and dye everything yourself. I’ve spent ages trolling the net to see what others charge for their yarn and came up with a few price categories based on effort spent and complexity of spin.
Describing the yarn is the fun part, although working out WPI, and yardages for all of them was not. For each yarn I had a little description, a detail about the process or sustainability of the yarn (if appropriate), a knitting tip, and an explanation for the name. Setting up listings for 29 skeins is a bit of a mammoth task, but I need to remember that once the shop is up and running, each additional item won’t be as time-consuming.
I haven’t really mentioned knitting here before, but those who know me well will know that I knit constantly. One of the great pleasures of spinning is being able to knit the things that I spin, although I don’t do it as often as I should. Below are a few of my knitting-with-handspun experiences and some good tips that I’ve learned along the way!
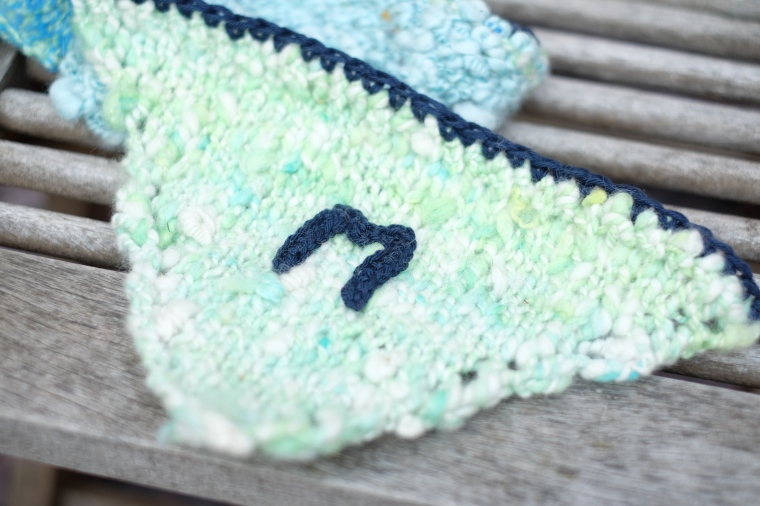
Above are my first knit-able handspun attempts. I did them from raw fleece from Clive the pet merino-cross that I washed, dyed, and hand carded. They’re very unevenly spun, and have some big felted chunks in them, from where I struggled to card with any kind of proficiency. Very beginner attempts, really, but they were very special because they marked the beginning of my love of spinning. I knit them into a string of bunting for my niece and crocheted her name onto them. Because of the unevenness of the yarn, it was a bit of a challenge, but I also found that this kind of project is a lovely way to enjoy the crazy texture of a yarn like this. The felted slubs that I had spun into the skeins because of my lack of skill ended up being lovely texture.
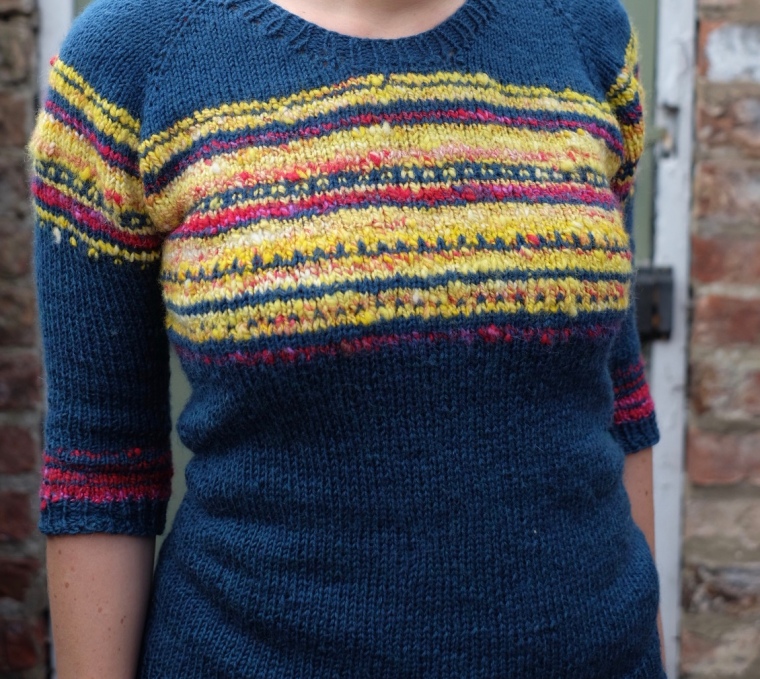
Next attempt was more ambitious. I had spun up the following two skeins: Red handdyed merino cross plied with Australian Alpaca, and yellow and red handdyed 2-ply merino cross. All merino cross was process from the raw fleece of Clive the pet sheep.
Both these skeins were carding and plying accomplishments for me, and so I decided to knit them into the yoke of a jumper. Which turned out like this:
I should mention that my original bind-off method for the neckline rib was too tight and pulled the jumper up at the front. Since this photo was taken, I’ve gone back and changed this and it’s much better!
I love this jumper to pieces. But I had a bit of a problem…
When I started out I figured out an average wraps per inch for the handspun, and deemed it to be a worsted weight. So I chose some nice worsted weight commercial yarn and knit the whole thing as if the different yarns were the same. But of course the handspun wasn’t. And as a result I have bagging along the raglan line above the armpits, and over the tops of the sleeves. It’s pretty clear in the above photo. Every so often, when I wear this and look in the mirror, the bagging of the handspun drives me nuts and I wish I’d been more sensible and swatched it first.
This brings me to my first tip…..
Gauge swatch and do the math! Do it!
Nobody likes doing it, but swatching is so important!! I learned this the hard, time-wasting way.
Especially do this if your handspun is textured. You may need to adjust needle sizes, or adjust your stitch count when switching back and forth between yarns. Remember that going down a needle size might make the knit handspun too dense and it won’t drape the same way as the rest of the garment. Or maybe you need to go up needle sizes and decrease stitches so that the knitting is looser for a proper drape.
I employed this with success in my most recently finished project.
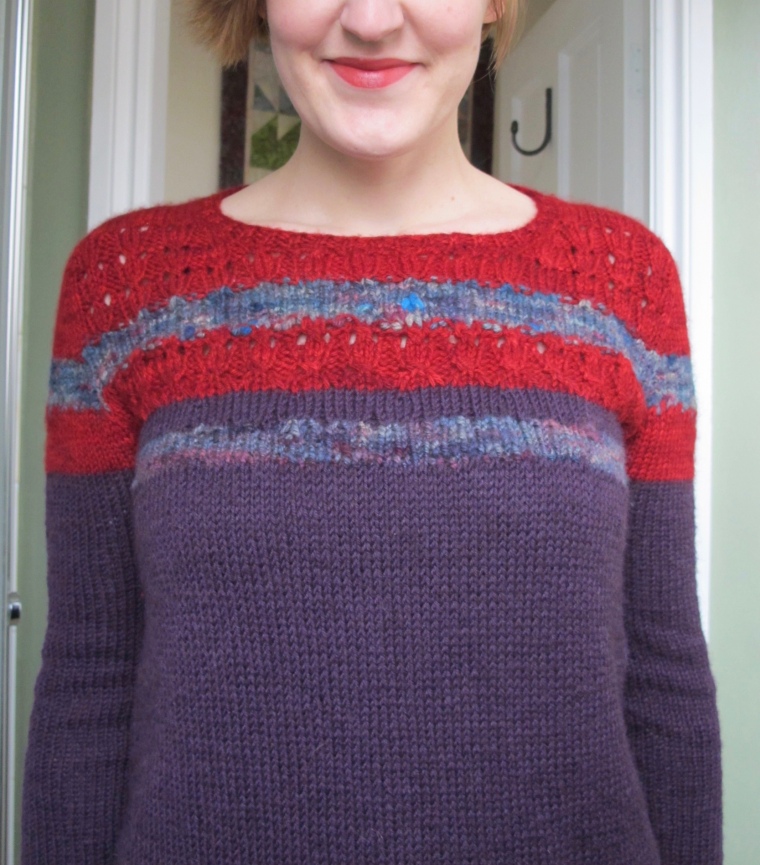
Self-designed pullover, knit top-down and seamlessly, using handspun for stripes
This pullover incorporated a beautiful skein of my friend Sylvie’s handdyed yarn (check out her Etsy shop: Phileas Yarns ) with this handspun and handpainted BFL:
Grey BFL 2-ply,with slubs of merino felt, and handpainted
While the handspun was approximately an aran weight, like the other yarns, it knit up to be 4 stitches/inch while the other yarns were 5 stitches/inch. Actually a pretty big gauge difference when multiplied over the circumference of a jumper. On first go I went down a needle size for the handspun, but it wasn’t precise enough and I had funny baggy bits and the knitting was too dense compared to the nice drape of the rest of the yarn. So I pulled back the yoke and did it again. This time I decreased one every five stitches when switching to the handspun, and increased one every four when switching back. The result is perfect! And the changes in stitch count are not too noticeable.
How I love this sweater!
Wearing something that you’ve spun yourself is one of the greatest joys of knittting!
Next post, I’ll continue and talk about shawl knitting and mixing sheep breeds when knitting with handspun. Stay tuned!!!!
In my previous post, I talked about spinning up some grey Gotland top into a lace-weight single. This time I’ll talk about spray dying it before plying, and also dying and spinning up a mid-grey Massam top.
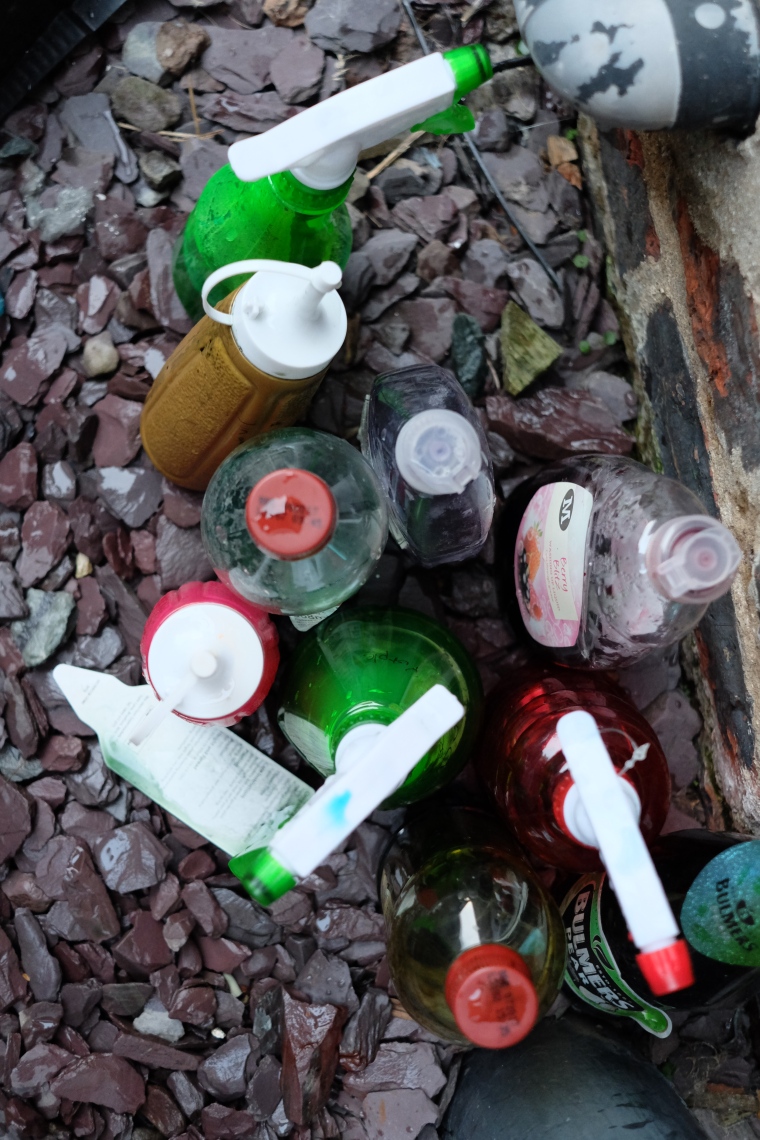
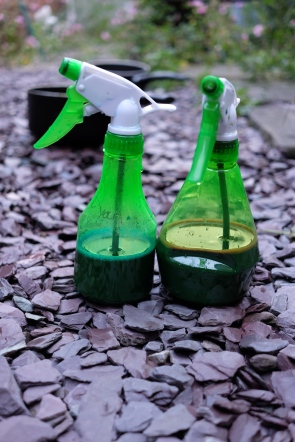
Spray dying is fun and can be easily done outside, which is how I like to work. Even in the rain, you can get a good dye job done, and I love feeling like the fresh air and the crisp Northern England damp are spun into my yarn. It’s a little bit unpredictable, but since dying grey fleece is a bit unpredictable anyways, I don’t have a problem with this.
The outdoors dye studio
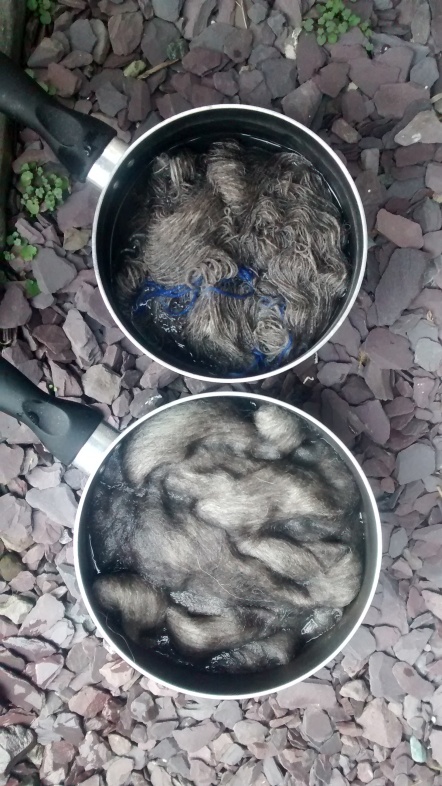
Just like with handpainting and dying, I always start with a good long soak in vinegar and water.
Pictured above is my Gotland single and my Massam top, bathing in vinegar and coordinating nicely with the slate gravel in my back garden.
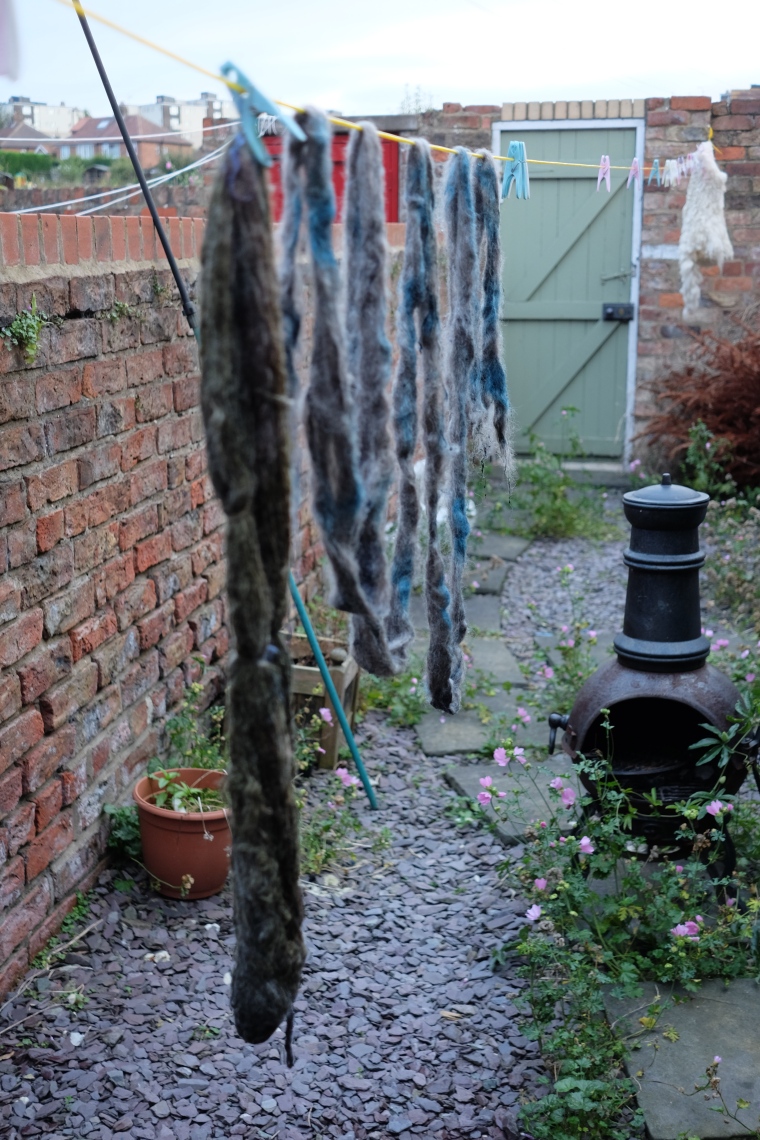
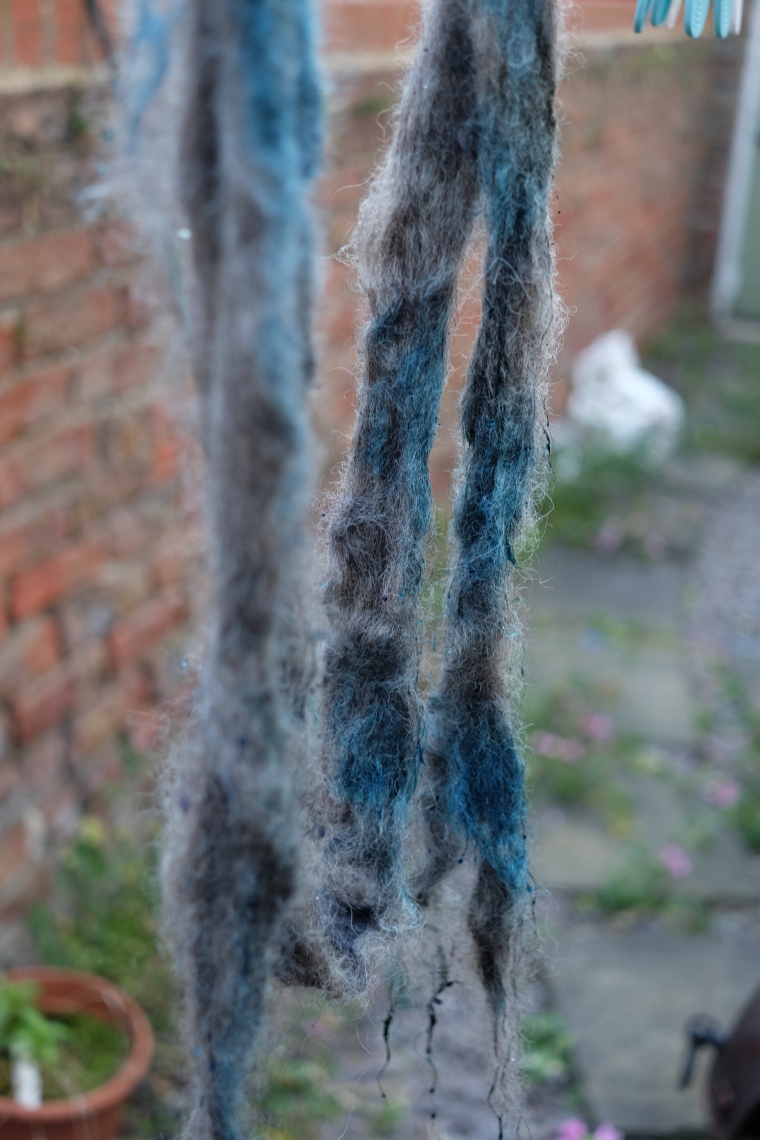
Once the items have soaked for a good half hour to 45 minutes I hang them out on the washing line. It’s good to let them drip for a little bit before applying the dye so that all of the dye doesn’t drip away.
Wool in the garden, after being sprayed
With skeins I start spraying at the top and let the dye soak in and drip down before spraying in further down. With top, since it’s sort of slung over the line I concentrate the dye at the bottom of the loops and then work my way up.
After applying the dye, I let it sit on the wool for about 45 minutes and then I carefully wrap it up in long sausages of cling film or plastic wrap, pop it into Ziploc bags, and steam it in a colander on the stove for about 45 minutes. Then I let it cool a bit outside before unwrapping it into a sink of warm water, and letting any excess dye rinse away.
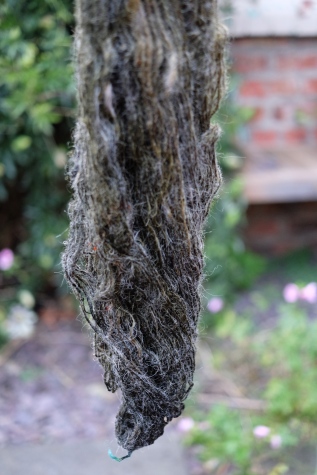
The thing about spraying when the wool is hanging is that you can’t separate the strands of yarn or fibres like you can when handpainting in a tray. With grey fleece it’s even more of a gamble because when wet, it’s so dark that it’s hard to tell where the colour is going. My Gotland single was a complete mystery until it had been rinsed and dyed.
The grey Gotland single looking like a tangled mess. As it hangs and drips, it takes on a very light-coloured halo that makes identifying the colours very difficult.
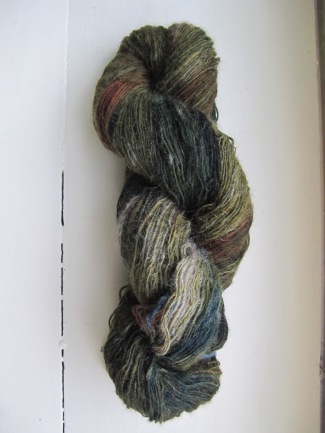
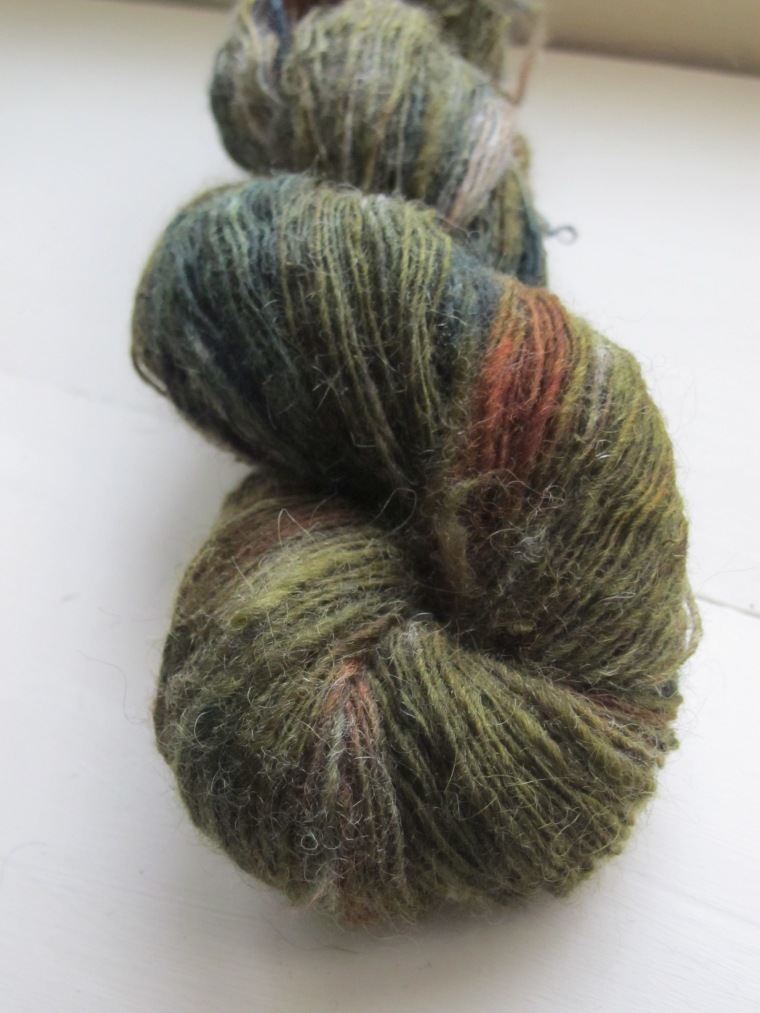
So on that note, I’ll talk more about the individual pieces that I dyed this time. The Gotland single was a lovely soft grey all on its own. However, I always intended on dying it as the next in my series of landscape-inspired yarns (for more on that, check out Landscape Yarns). The colours were inspired by my drives through the Scottish Borders region. I sprayed the skein with some olive green, a bit of yellow, and a dark forest green, and then dribbled on some of a terracotta colour from a squeeze bottle.
BeforeAfter
The result was just as I had hoped, and captures the shifting greens and earthiness of the views from my drives down the M74 motorway.
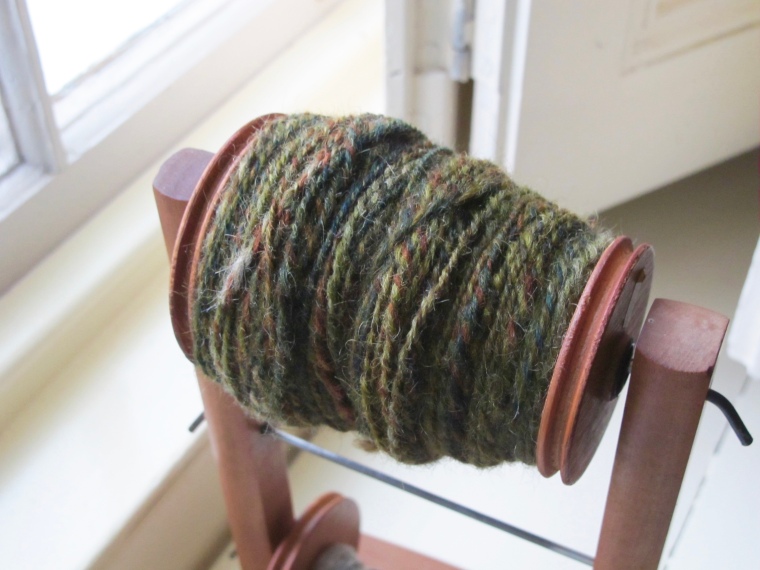
I should have left it as it was, but I went ahead with the original plan and chain plied it into a DK weight yarn. The result is pleasant and almost looks like a tweed yarn, but I think I prefer it the way it was as a single. It was a good experiment, but I have some regrets, and I feel like the more dramatic colour shifts that I liked in the single were lost in the plying.
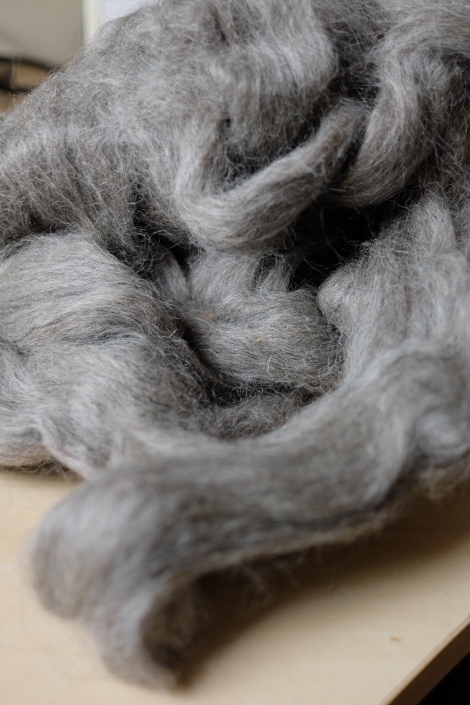
The Massam top which I dyed the same day was my first time working with this breed of fleece. In many ways it’s a lot like Gotland, but it’s a British sheep from the north, originally bred from a cross between Wensleydale and Swaledale breeds. It’s soft, with long staples and a lovely halo.
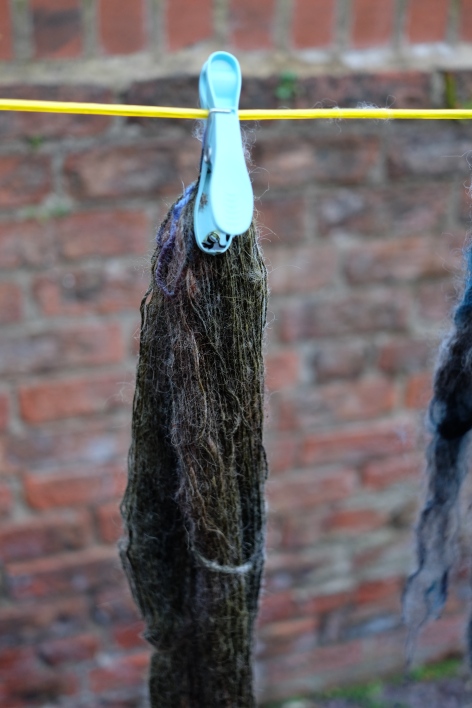
Massam top, showing off it’s lovely lustre and soft grey
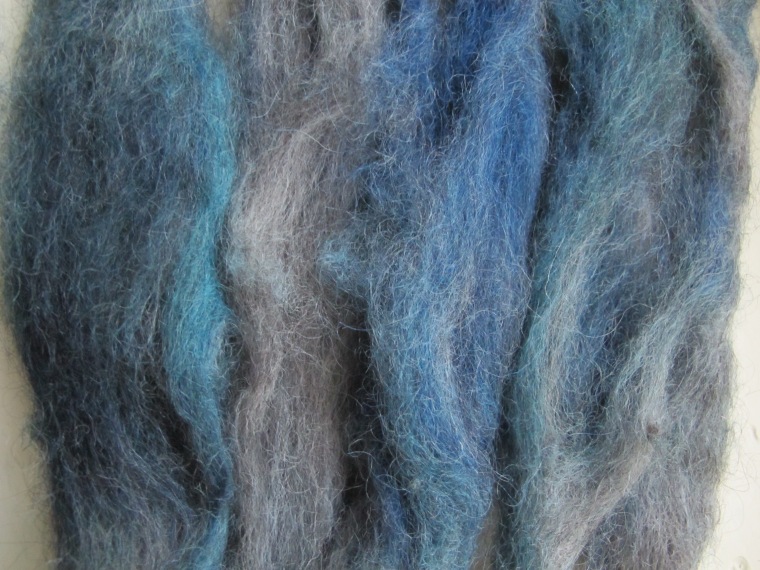
Spray dying this was very quick. With the natural grey as the base, I only used one main dye, and a few dribbles of a darker contrast blue and let the dripping of the wet top do the blending of colour for me. I wanted to leave quite a bit of the grey showing since in the past I’ve gotten carried away with the spray bottles and the resulting top hasn’t had very much variegation.
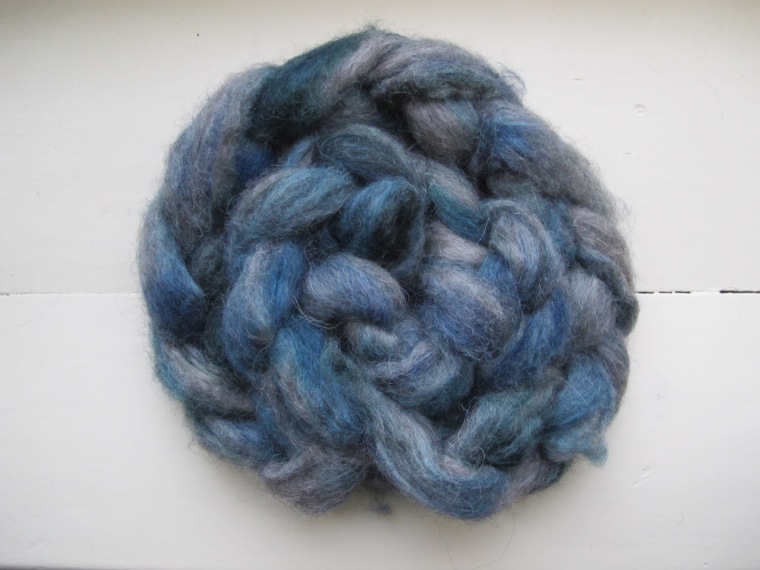
Above is the wet, dyed top, hanging on the line. Below it’s all dried and fluffy.
Spinning it was a proper pleasure because of the long staples and soft, lightweight texture. I decided to leave it as a single because I was pleased with how the variation in blues turned out.
And that concludes my grey-sheep adventures so far. Next I’m moving on to some lovely brown French merino and a lot of undyed raw alpaca fleece!
This post is a continuation from my previous post (Beginning Adventures with Grey Sheep) which described my beginning explorations of working with grey fleece. While before I focussed more on the pleasures of dying grey fleece, and yarns that were a combination of grey and white fleece, I have also been exploring different breeds of grey sheep and what they are like to spin with.
A delightfully tempting bag of grey wool top, full or possibilities.
Recently I made a big order of commercial tops, with trying out different breeds as my specific priority. I wanted some different grey breeds, and also bought some different shades of brown French merino to play with.
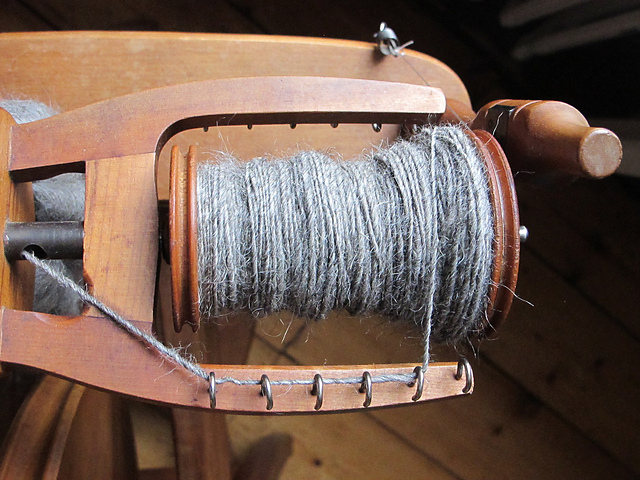
I started with a Gotland top, and spun it into a very fine lace weight single. Most of it was spun out in the garden on an unseasonably warm and sunny day.
In this photo you can see how long and fine these fibres are.
Gotland is a Scandinavian breed originating on the Gotland Island in Sweden that has a long outer fleece and a soft, shorter, inner layer. Combed together it makes for a unique spin, because it has the softness and lustre of finer breeds, but the staples are long and spin up to have a slight halo akin to that of alpaca yarn. Long staples mean that you can spin it into a very fine single that is relatively strong. I wish I had spun with this breed when I was learning to spin, and was constantly over-twisting and breaking my yarn. It’s lovely to handle, but also easier to get a fine, even spin than other popular breeds, like merino and corriedale and blue-faced Leicester.
The result of all this outdoor spinning was this lovely single:
Although my plan all along was to chain ply this single, I took it off the bobbin to hand paint it, with the intention of plying it off of my yarn swift after I’d dyed it. However, I almost wish that I had just left it as it was because it was lovely in it’s natural, undyed state.
Next up: A much longer post about dying this single along with a lovely Massam grey top, some plying and some more spinning.
Dying grey wool is my newest love, so I thought I’d better write a post about my grey wool adventures so far.
The grey wool love started when I spun and dyed a couple of skeins of yarn for my friend Holl yas a thank-you for gifting me a pair of hand carders. I used two corriedale tops, a grey and a white, and plied them together before spray dying them. This was also my first time spray dying, and it was very successful.
Lovely grey corriedale, hanging out on my lazy Kate, all ready to be plied.Grey and white corriedale yarn being spray dyed on the washing line. It was a rainy day, so I had to use a bin bag to shelter it while the dye soaked in.
The result was lovely, and I loved how the colours variegated with the different colours of wool. It also felt like a lovely way to celebrate the natural beauty of the fleece. Corriedale is a a lovely soft fleece with a nice lustre to it. Also, the white corriedale is not a pure white like some merino. I liked it for variegated dying because the colours fade more gently than when dying over a stark bright white.
The finished product.White corriedale plied with grey corriedale, spray dyed after plying
I was so pleased with how the grey wool created variation in the colour, that I went on to experiment some more…
Grey BFL 2-ply,with slubs of merino felt, and handpaintedColour detail of grey handpainted BFL
The above yarn was my first time handpainting a completely grey yarn. The colours were unpredictable but the end result was lovely. Although I used about 4 different colours on the one skein, it doesn’t feel like the natural grey is overpowered.
Grey merino plied with white merino, handpainted after plying.
The above merino skein is a favourite. The white merino top was lightly dyed to be a pale yellow before it was spun, and plied with a grey merino single. In painting it, my hope was that the yellow base would help to brighten the greens, while the grey ply would create some nice variations in the blues.
I had spun merino, and blue faced Leicester before, and now I’m looking forward to trying out other different breeds of grey sheep! For more, stay tuned to the next post.! If you’re interested in grey fleece and different sheep breeds, check out A Weekend with the Oldest Sheep in England
I’ve recently completed a couple of yarns inspired by familiar and favourite landscapes and am thinking of making a whole series specifically dedicated to the landscapes in my life. I used to be really fascinated with landscapes when I was in art school (a very long time ago!) and I’ve been remembering this a lot lately, as I’ve also been doing a great deal of driving along the edges of the stunning Scottish Borders and Northern Pennine regions in the UK. Both are open and vast with beautiful variations in natural colours.
The northern Scottish Border region, near the town of Biggar, taken by me on a very windy hike.
Here are my landscape yarns so far, based on two other favourite landscapes:
This one was inspired by early summer on the North York Moors in Yorkshire, when the heather is starting to bloom, but the moors are still very barren and red. It’s a beautiful expanse of empty and dramatic land with distant sea views. When I first moved to the UK, I remember driving through this region with a friend, and stopping by the road side to stand quietly together and look at the view.
Heather blooming on The North York Moors National Park, photo credit http://www.walkingenglishman.com (also a fab website for finding walks all over these beautiful places!)
This is a single that I spun from hand painted locks of merino cross fleece from Clive the pet sheep. It’s mostly sock weight, but was spun directly from the locks, so it’s textured and a bit thick and thin in places.
This was my first time painting locks, as I usually kettle dye them, or paint the yarn after its spun. It was very successful though, and there was much less blending of colours than I thought, so the yarn maintains the dyed variegation of the fleece, and some of the natural white comes through.
My other landscape yarn was spun from handpainted merino top. I like how dense merino top is, and how when you paint it gently, the colours maintain a brightness from the white fleece in the middle that the dye doesn’t reach. I dyed this to be turned into a self striping yarn. It was based on the landscape of my childhood: a basic combination of lake and trees and sky, translucent blues and variations of greens.
An old photo, taken many years ago at my favourite lake
I used three shades of green and one shade of blue on the top. I had hoped for a bit more variation in the blue, but I’m pleased with the translucency of the colour.
I spun it up as a thick single and then chain plied it to maintain the striping.
As a singleAs a 3-ply
The result is bulky and squishy. The idea was to make the yarn as comforting and cozy as my memories of the place.
Stay tuned for more landscape yarns. I’m sure I’ll be spinning up more soon 🙂