Knitting with Handspun Part 2: Shawls

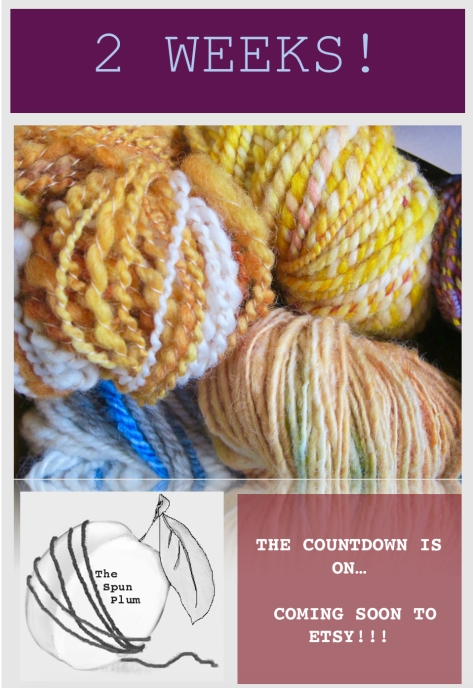
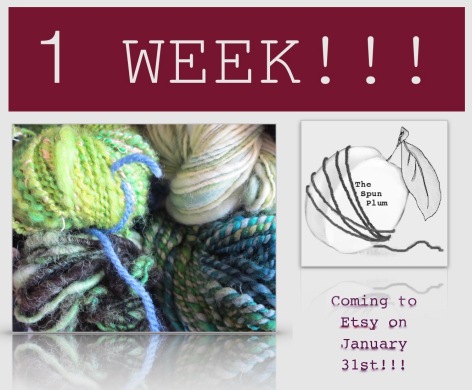
It’s about time I continued my posts about knitting with handspun yarn, especially now that my lovely Etsy shop (check it out here) is up and running and people are actually buying my yarn to knit with.  In my first post about knitting with handspun (Knitting with Handspun Part 1: Beginnings and Pullovers) I covered some of my earlier handspun knitting adventures.  This time I’m going to focus specifically on some shawls that I’ve made with my yarn and what I’ve learned along the way.

First of all, I have to confess that I am predominantly a sweater knitter. It would seem that knitters fall into categories of what they like to knit the best: sock knitter, mitten knitter, shawl knitter, sweater knitter.  I’m definitely the latter.  I love knitting sweaters and do that the most.  Accessories are usually in-between projects to me, to break up the time that goes into knitting a complete sweater.

12 in 2015
I may be a bit mad, but in 2015 I knit 12 sweaters.  Numbers 6 and 12 are handspun ones that I posted about previously.


Having said that, I have loved pretty much every sock, mitten, slipper, hat and shawl project that I’ve done.  Also, shawls are a lovely way to show off beautiful yarns without using large quantities.  A lovely handspun skein combined with other nice yarns makes a beautiful shawl.  You don’t need to worry about fit, and there are so many patterns out there for lovely striped and geometric patterns that highlight a beautiful yarn and great colour combinations.

12298866_862840167147963_1422698038_n_medium2

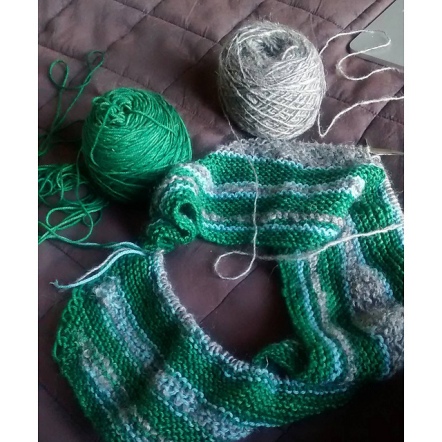
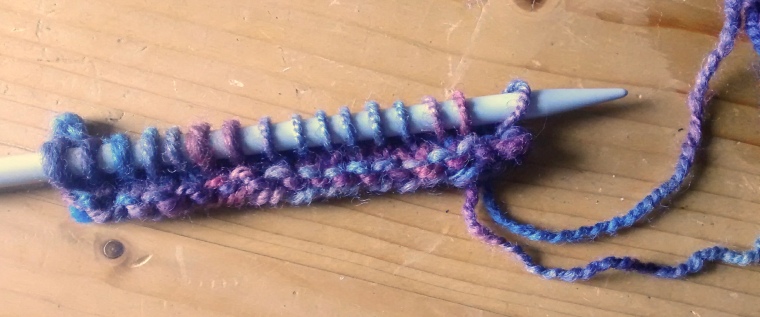
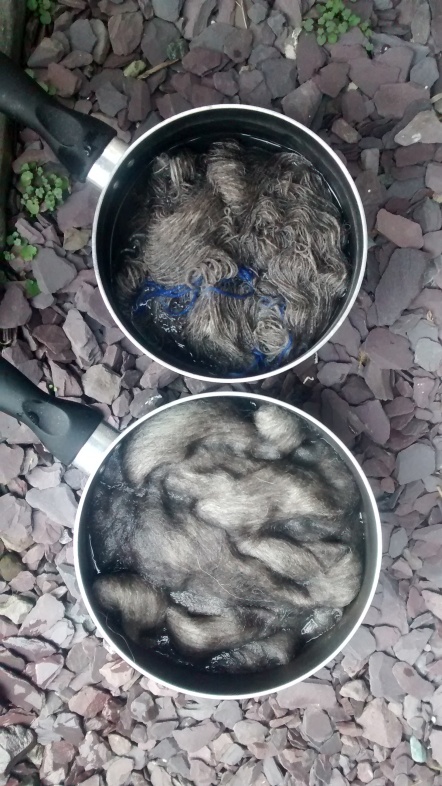
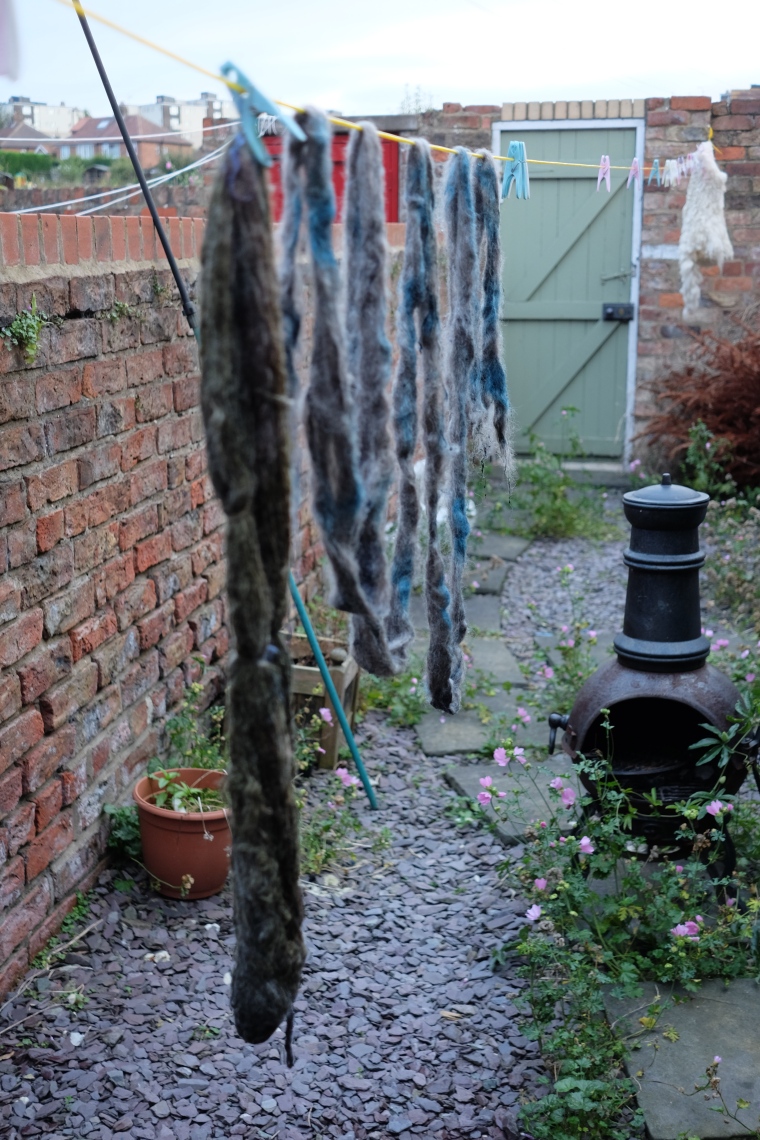
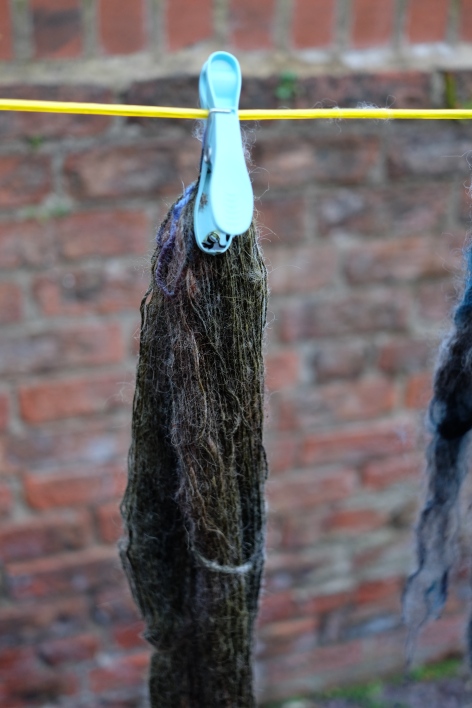
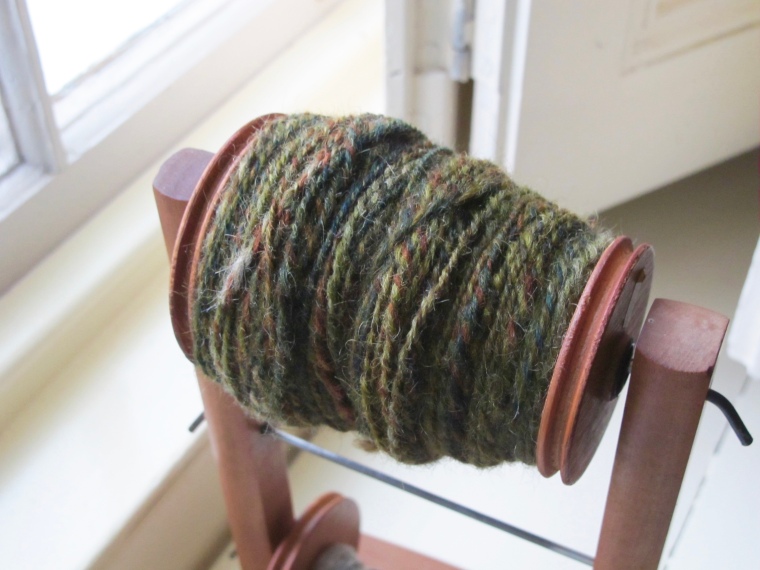
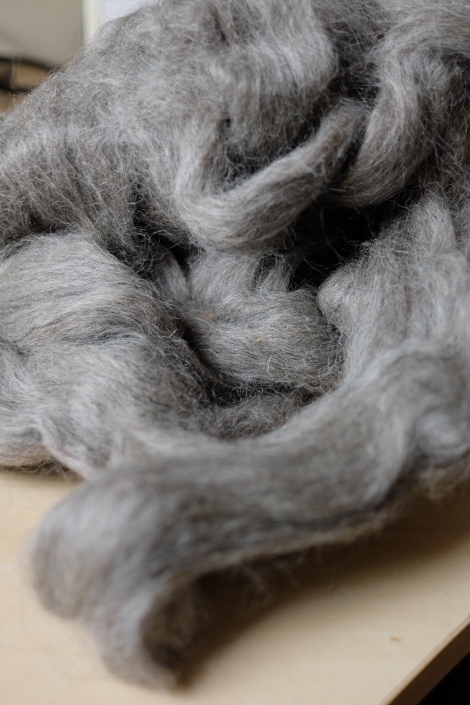
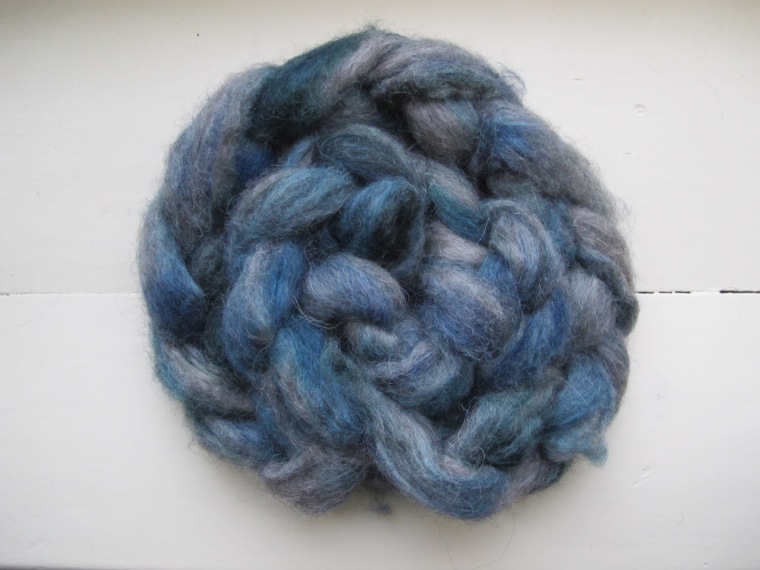
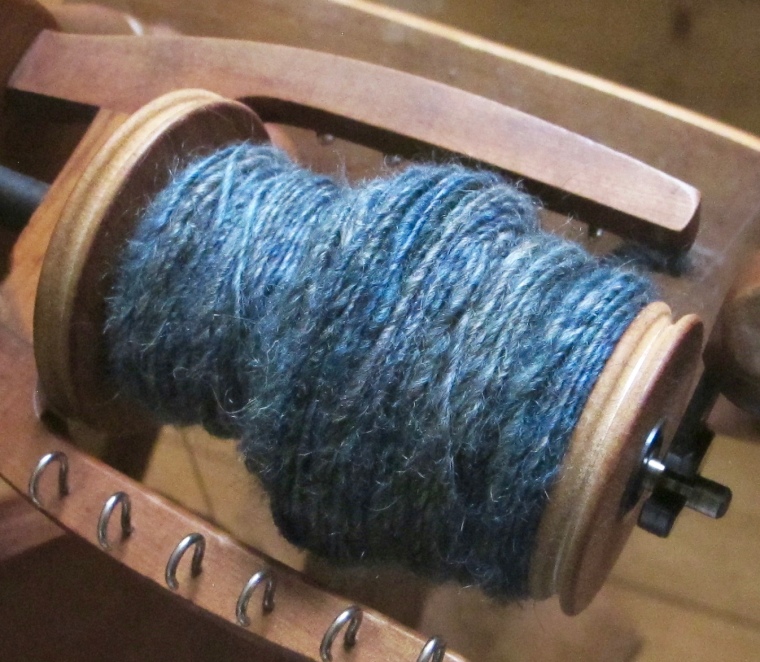
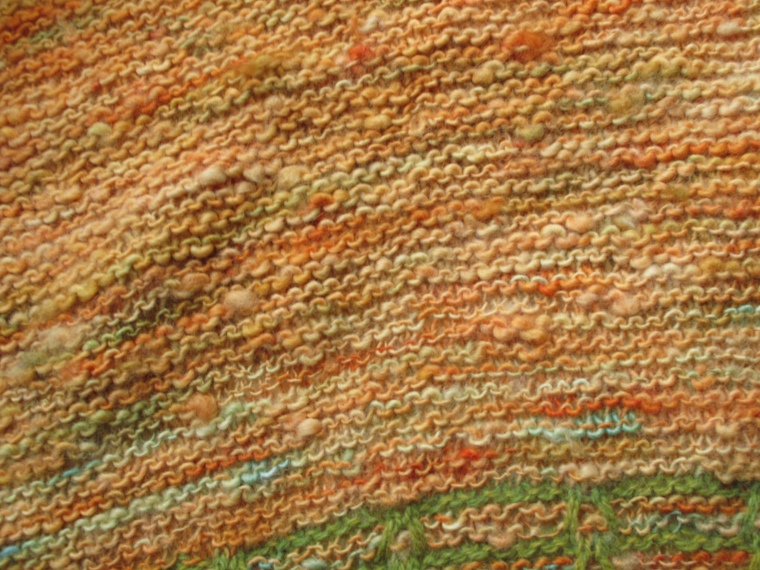
Above is the beginning shot of my most recently completed shawl; a cozy beast that I wear on almost a daily basis.  I knit it using some lovely handdyed yarn that I purchased as a treat from my friend’s shop Phileas Yarns.  The grey yarn is handspun that I made specifically for this project.  It’s un-dyed grey Massam, spun as a single to match the gauge of the green yarn.  Here it is below in its in-progress state, showing off its lovely halo and long-wool texture.

IMG_9853_medium2

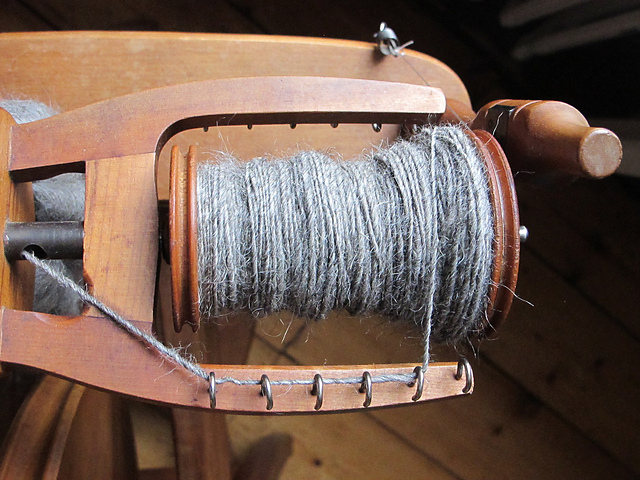
This project was great because the exact gauge of the handspun sections didn’t really matter.  They were worked as short row ‘clouds’ and so the slight variation in handspun texture didn’t affect the shape of the shawl.

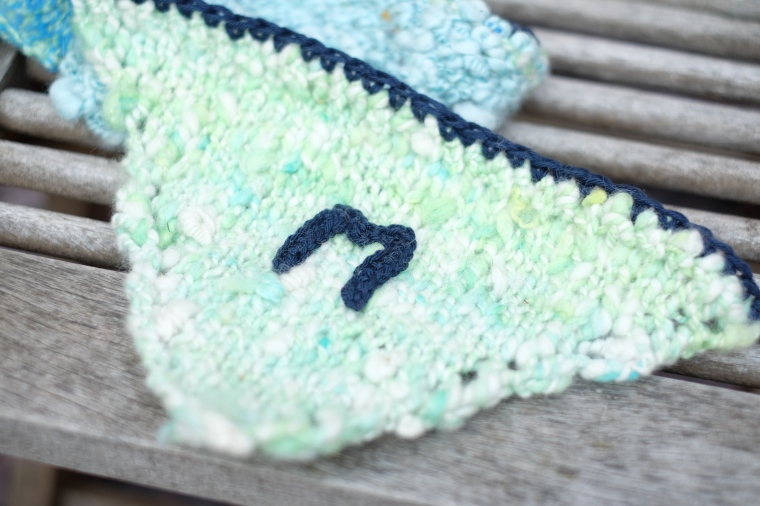
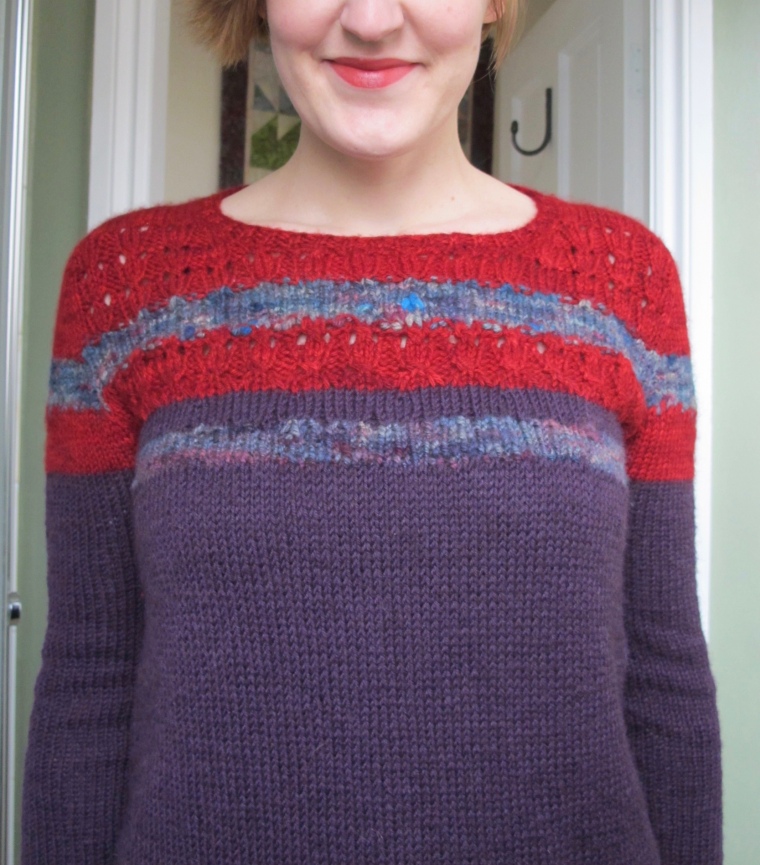
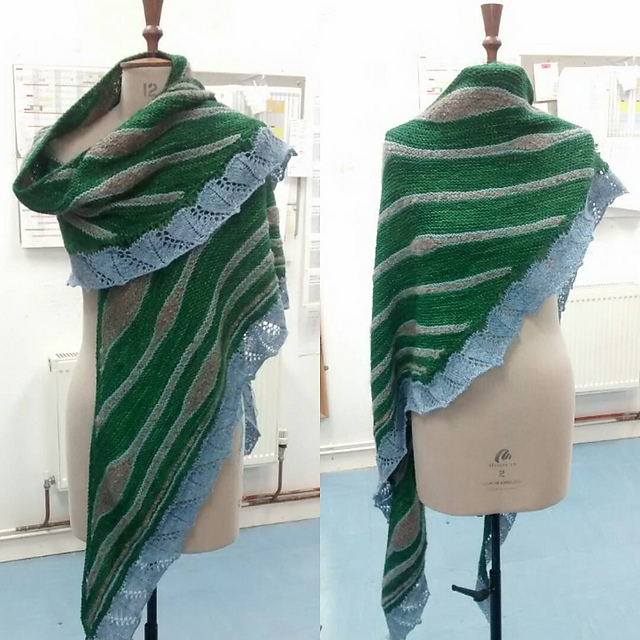
The finished result:

12552265_583471335137258_938104290_n_medium2
Knit from the pattern Northern Sky by Christelle Nihoul

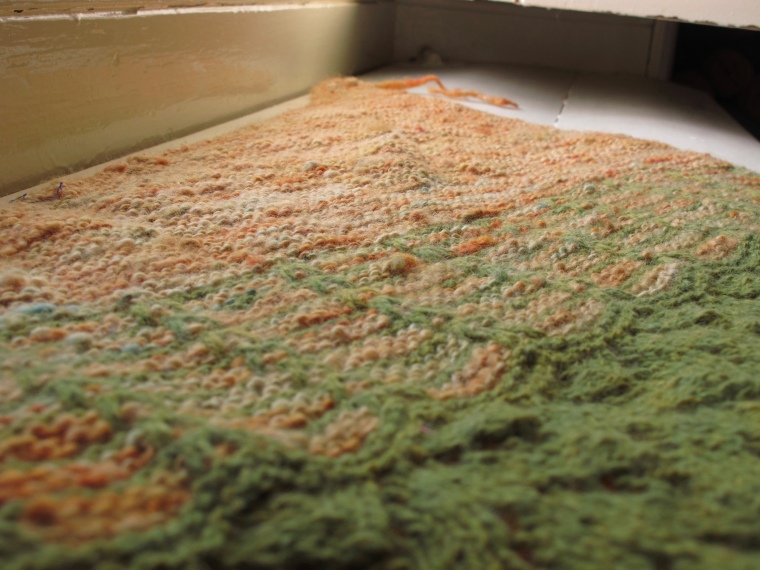
This felt like a real success, particularly in comparison with my first handspun shawl:

IMG_9531

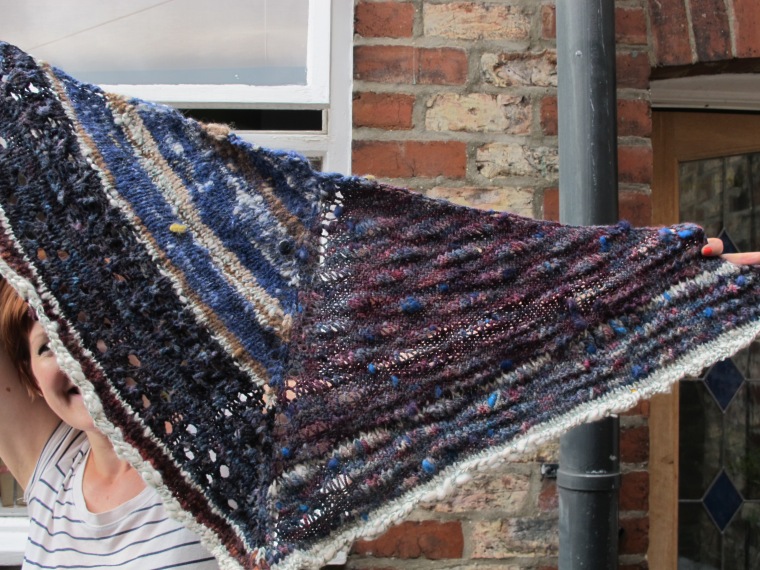
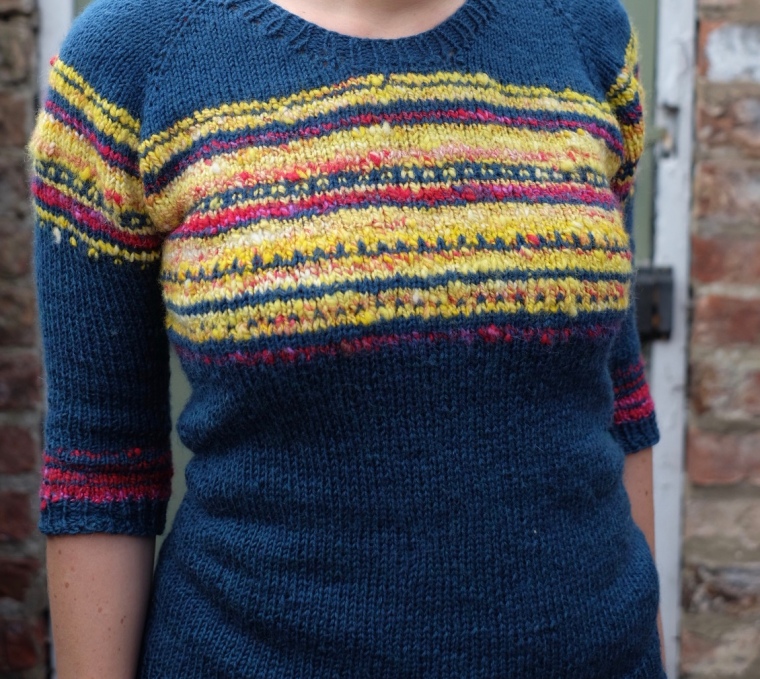
Behold the Transcontinental Alpaca and Three Sheep Shawl:  A product of wool geekery, in which I got a thrill out of knitting with three breeds of sheep and alpaca from two continents.  This was a completely handspun project and I was very excited about it.  The end result was a bit crazy looking, but I was totally in love with it.  I knit it from the following yarns:

Clockwise from top left:  Australian alpaca blended with Canadian alpaca,  dyed and undyed; thread plied, undyed merino cross; handpainted ryeland; handpainted BFL

I’ve mentioned this shawl before in a very early post about ryeland fleece ( A Weekend With The Oldest Sheep in England)  Basically, the ryeland has a springy cobwebby texture, which evidently stretched during knitting and gradually retracted over the course of a few weeks, meaning that the shawl started to shrink and warp.  I eventually pulled it out and learned this very important lesson, which is now my second knitting with handspun tip:

You can’t always mix fibres and yarns as if they are identical

Different yarns behave differently.  Different fibres certainly behave differently.  And there are a lot of different factors involved in why.  In this case I took a super squishy alpaca, combined it with the springy retractable ryeland, and then added in a soft, but hardwearing BFL which had been tightly plied.  The result was that while the alpaca bloomed and fluffed during blocking, the ryeland shrank, and the BFL just hung there draping beautifully, but not moving at all.  The result: a warped shawl.

The solution is to gauge swatch, take little samples and block them, and be careful with how you combine very different handspun yarns in a project.  The green shawl above was successful because the handspun sections could behave however they liked and it didn’t throw off the rest of the shawl.  My multi-fibre handspun shawl was a triangle shawl with centre increases so that every row depended on each other and each half of the shawl was integral to the other.

DSCF4138

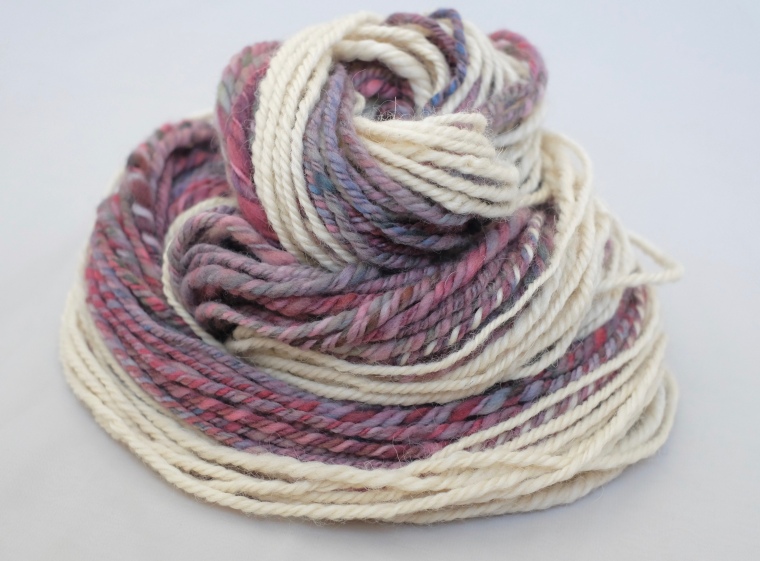
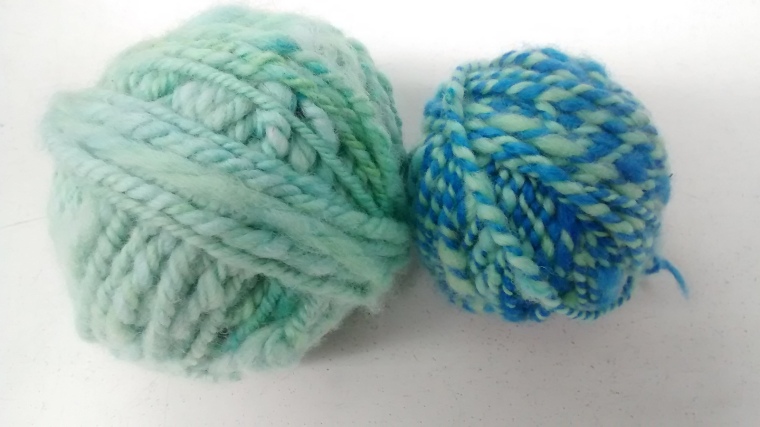
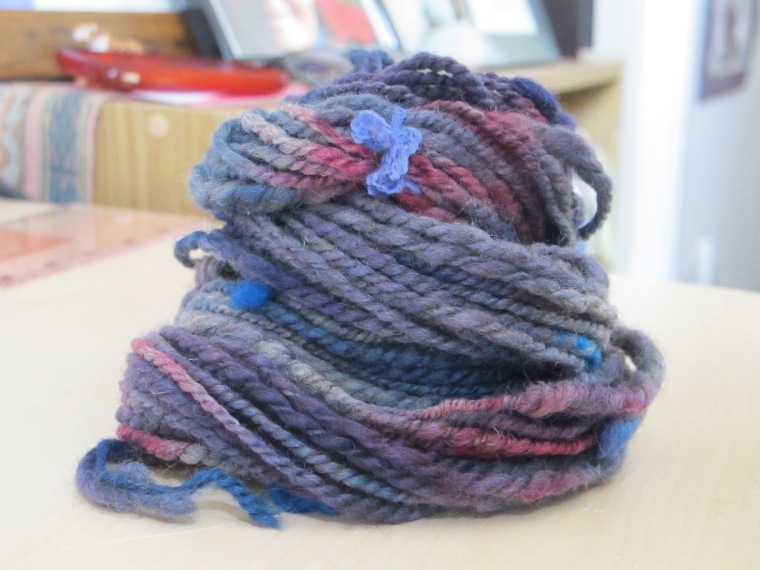
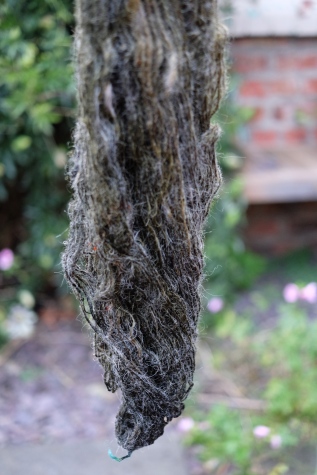
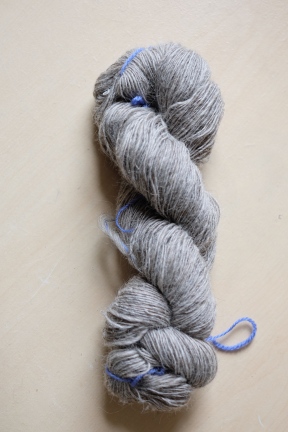
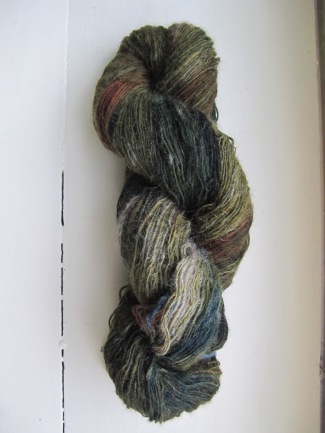
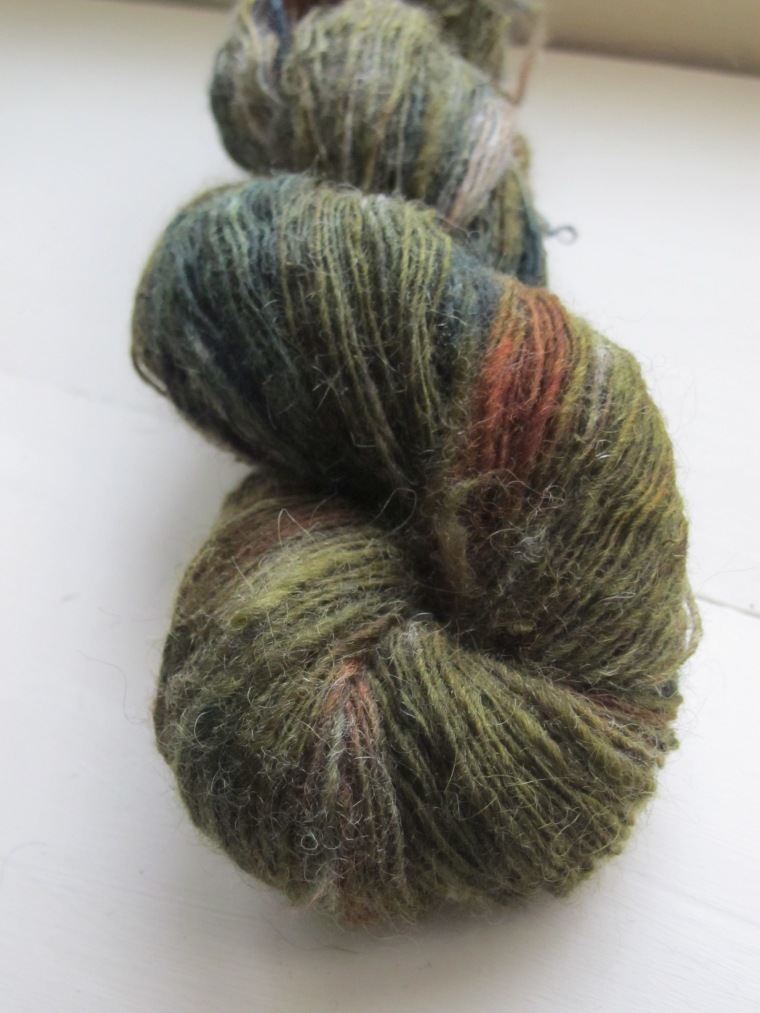
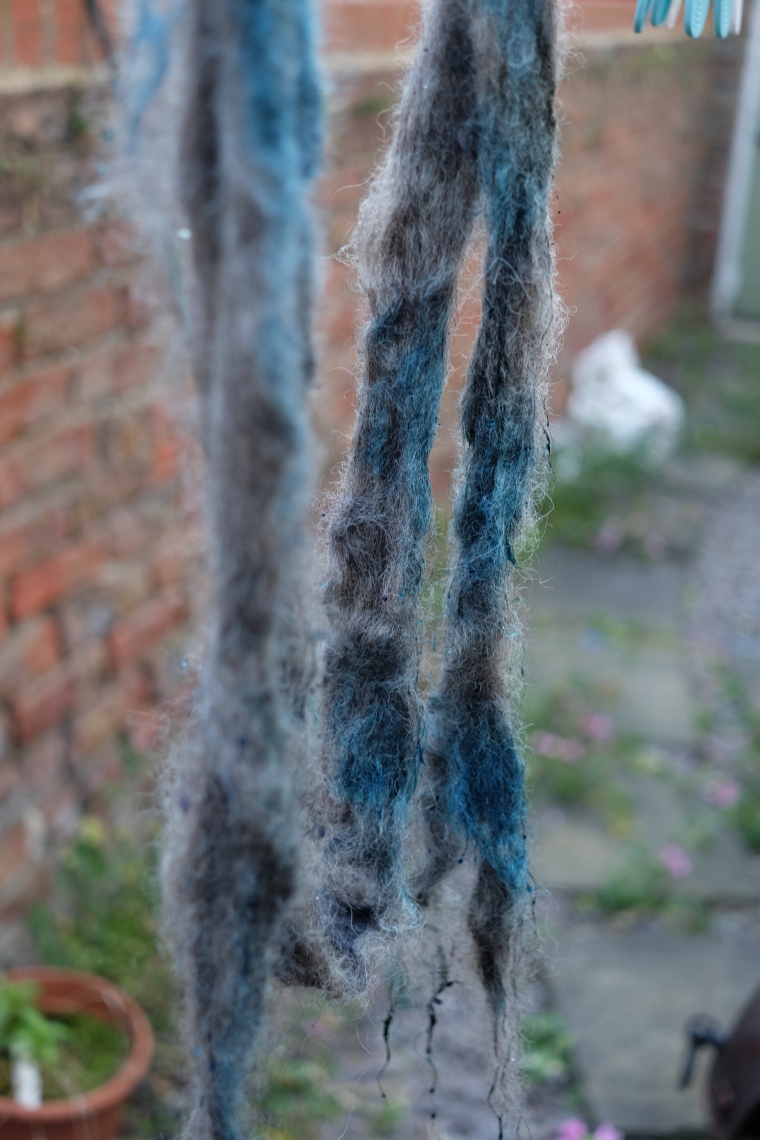
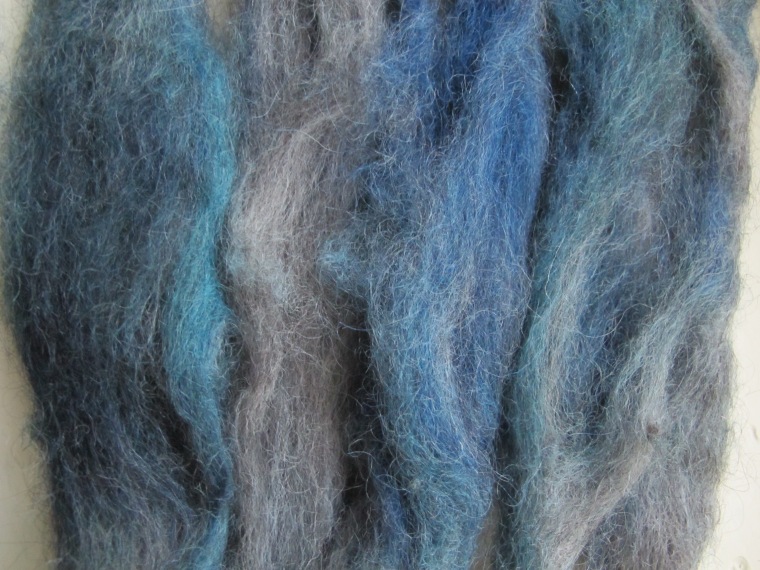
I had to think about this just yesterday when I finished up with the above skein of yarn and listed it in my shop.  This is a self-striping yarn that changes back and forth between hand-dyed merino and undyed, natural cream Massam.  It has a lovely combination of textures.  However, knitting with it will require a good gauge swatch because of the striping between the two fibres.  The merino is soft and squishy and is far more compact-able than the massam.  This means that the gauge that it’s knit in will have to work for both fibres and both of them need to be swatched for.  While the merino can squash down to a fluffy and tight gauge, the same tight gauge on the Massam will not drape as nicely because it won’t squish down the same way.  A looser gauge that works for both and allows them to both move and drape nicely will be required.

Now on to my last handspun knitting tip:

IMG_9877

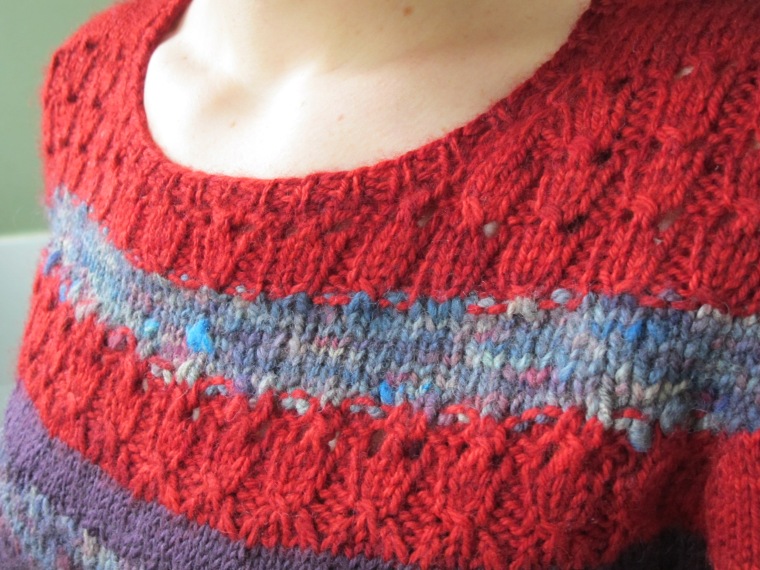
Above is an almost-complete shawl, which I’ve since decided to modify and have pulled back.  I knit it from an all-time favourite handspun single which I spun from the fold with the fleece from Clive the pet sheep.  This yarn was one of my first times hand-painting.  I loved it so much and purchased as special skein of naturally hand-dyed camel/alpaca/merino blend to combine with it.

IMG_9797
Handspun single from Clive, hand-painted after spinning.

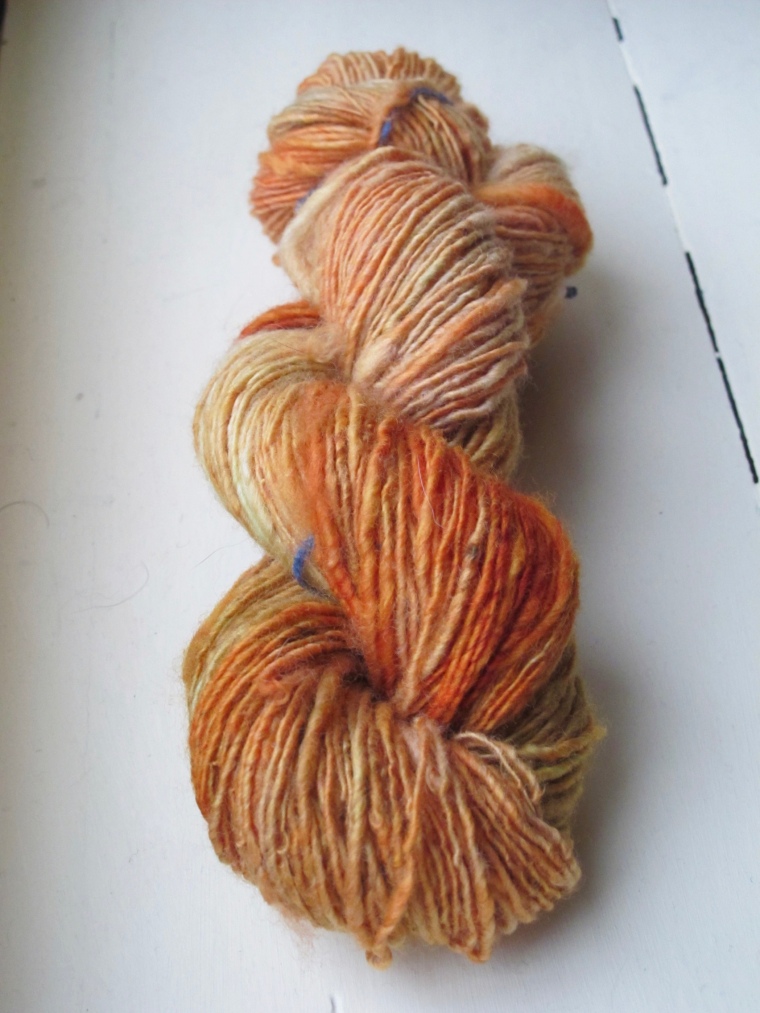
I used the pattern Byatt by Karie Westermann which calls for a specific brand of yarn, 100g of each colour.  I had 100g of the handspun skein and 50 g of the other one, so I thought at some point I’d spin or dye up another 50 g of contrast colour and finish it off that way. However, what I didn’t take in to account is that, unlike with most commercial yarns, you can’t really estimate how much you have by weight.  I usually think to myself that 100g of fingering weight is enough for a pair of socks, 450-550g for an aran weight sweater, 300-400g for a fingering weight sweater, 200 g of anything for a shawl, etc.  However with this shawl, I ran out of the handspun really really quickly, which is too bad, because it knit up really nicely.

IMG_20151030_073157_medium2

IMG_9880

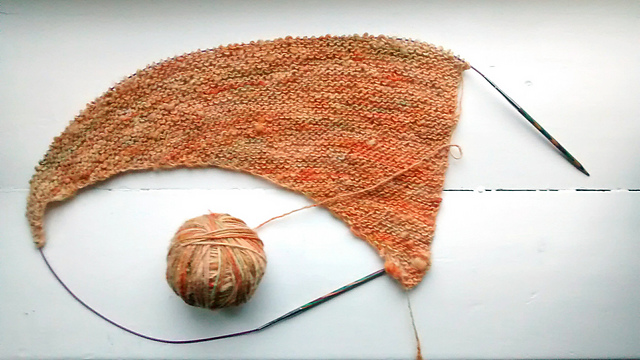
Lovely “from the fold” texture, great colour variegation, and all in all a nice way of showcasing a raw fleece yarn.  However, because I ran out so quickly, I had to completely readjust the pattern and then ended up running out of my contract colour too quickly as well, which threw everything off.  My solution was to dye up another contract colour and swap it in to the pattern with my other contrast colour as soon as I ran out of handspun.  The result is nice, but it’s pretty disheartening to pull back so much work.  I could have avoided this if I’d actually paid attention to the yardages I had and the yardages that I needed, and had planned from the beginning.

So the last tip is:

Judge the amount you need by yardage and not by weight

This especially applies to yarn that’s been spun from the fold from raw fleece.  The natural kinks and slubs that make yarn handspun from fleece so lovely can also make it heavier, meaning that you have less yardage for every 100 grams.  Yarn like this has little pops of felt that give a beautiful organic texture and speak to the origin of the yarn.  Fleece felts on the sheep as it rubs against things, stands in the rain, sleeps in the field, and basically lives its life outdoors.  Including these felted fleece bits in the yarn feel, to me, like including a bit of the sheep’s story into the work.  But you can’t underestimate how dense and heavy they can be.  Commerically combed and spun yarns and some hand-carded handspun yarns can have a lot of yardage for less weight because they have a lot more air in them.  Spun-from the fold yarns may have a lot more story in them, but they are much denser.

I will continue to knit with my own handspun, so more handspun knitting posts will follow in the future!


Setting up Shop

The time has come!  In a week I’ll be opening an Etsy shop for my handspun yarns.  Eventually I’d like to start selling hand-painted wool tops, but for now I’m going to focus on getting my yarns online and seeing how it goes.  This is something that I’ve been planning for quite a while and this week I’ve been cramming to get everything done in time.  I had 29 skeins to photograph and describe, business cards to order and yarn labels to design!  I’ve also been trying to set up a yarn brand page on Ravelry, but that has been a bit of a slow process.

2 WEEKS BANNER

1 week banner (1)

With my very limited graphic design skills I’ve been trying to hack out some countdown banners for Facebook and Instagram.  I’ve been slowly gathering followers on Instagram over the last little while, but I’ve yet to see if it will be successful as a marketing tool!

I also designed my own business cards…Setting up shop 4

Setting up shop 5

And yarn labels….

Setting up Shop 2

The labels are a tricky one because I still can’t decide if I want tie-on tags or wrap-around labels.  I’m going to stick with the wrap-around ones for now, and see how they turn out.

Yarn photography took place on the stairs in my house, which I discovered has fabulous natural light especially when it’s a little bit overcast, which it is most of the time.  I laid out a cream sheet with grey chiffon over top and got snapping.  Here are some previews…


Pricing? Agh!  The problem is that handspinning is not cost-effective if worked out by hours of labour.  This is especially the case when you work from raw fleece, and dye everything yourself.  I’ve spent ages trolling the net to see what others charge for their yarn and came up with a few price categories based on effort spent and complexity of spin.

Setting up shop 1

Describing the yarn is the fun part, although working out WPI, and yardages for all of them was not.  For each yarn I had a little description, a detail about the process or sustainability of the yarn (if appropriate), a knitting tip, and an explanation for the name. Setting up listings for 29 skeins is a bit of a mammoth task, but I need to remember that once the shop is up and running, each additional item won’t be as time-consuming.

Stay tuned!  In exactly a week’s time, on the 31st of January, http://www.etsy.com/shop/TheSpunPlum will be a working link!

Knitting with Handspun Part 1: Beginnings and Pullovers

I haven’t really mentioned knitting here before, but those who know me well will know that I knit constantly.  One of the great pleasures of spinning is being able to knit the things that I spin, although I don’t do it as often as I should.  Below are a few of my knitting-with-handspun experiences and some good tips that I’ve learned along the way!

IMG_20150512_112111734

Above are my first knit-able handspun attempts.  I did them from raw fleece from Clive the pet merino-cross that I washed, dyed, and hand carded.  They’re very unevenly spun, and have some big felted chunks in them, from where I struggled to card with any kind of proficiency.  Very beginner attempts, really, but they were very special because they marked the beginning of my love of spinning.  I knit them into a string of bunting for my niece and crocheted her name onto them.  Because of the unevenness of the yarn, it was a bit of a challenge, but I also found that this kind of project is a lovely way to enjoy the crazy texture of a yarn like this.  The felted slubs that I had spun into the skeins because of my lack of skill ended up being lovely texture.

DSCF2814

Next attempt was more ambitious.  I had spun up the following two skeins:  Red handdyed merino cross plied with Australian Alpaca, and yellow and red handdyed 2-ply merino cross.  All merino cross was process from the raw fleece of Clive the pet sheep.


Both these skeins were carding and plying accomplishments for me, and so I decided to knit them into the yoke of a jumper.  Which turned out like this:

2015_0621_13470700
I should mention that my original bind-off method for the neckline rib was too tight and pulled the jumper up at the front.  Since this photo was taken, I’ve gone back and changed this and it’s much better!

I love this jumper to pieces.  But I had a bit of a problem…

When I started out I figured out an average wraps per inch for the handspun, and deemed it to be a worsted weight.  So I chose some nice worsted weight commercial yarn and knit the whole thing as if the different yarns were the same.  But of course the handspun wasn’t.  And as a result I have bagging along the raglan line above the armpits, and over the tops of the sleeves.  It’s pretty clear in the above photo.  Every so often, when I wear this and look in the mirror, the bagging of the handspun drives me nuts and I wish I’d been more sensible and swatched it first.

This brings me to my first tip…..

Gauge swatch and do the math!  Do it!

IMG_20151224_122200
Nobody likes doing it, but swatching is so important!! I learned this the hard, time-wasting way.

Especially do this if your handspun is textured. You may need to adjust needle sizes, or adjust your stitch count when switching back and forth between yarns.  Remember that going down a needle size might make the knit handspun too dense and it won’t drape the same way as the rest of the garment.  Or maybe you need to go up needle sizes and decrease stitches so that the knitting is looser for a proper drape.

I employed this with success in my most recently finished project.

IMG_9903
Self-designed pullover, knit top-down and seamlessly, using handspun for stripes

This pullover incorporated a beautiful skein of my friend Sylvie’s handdyed yarn (check out her Etsy shop: Phileas Yarns ) with this handspun and handpainted BFL:

Grey BFL 2-ply,with slubs of merino felt, and handpainted, handspun
Grey BFL 2-ply,with slubs of merino felt, and handpainted

While the handspun was approximately an aran weight, like the other yarns, it knit up to be 4 stitches/inch while the other yarns were 5 stitches/inch.  Actually a pretty big gauge difference when multiplied over the circumference of a jumper.  On first go I went down a needle size for the handspun, but it wasn’t precise enough and I had funny baggy bits and the knitting was too dense compared to the nice drape of the rest of the yarn.  So I pulled back the yoke and did it again.  This time I decreased one every five stitches when switching to the handspun, and increased one every four when switching back.  The result is perfect!  And the changes in stitch count are not too noticeable.

IMG_9900
How I love this sweater!

Wearing something that you’ve spun yourself is one of the greatest joys of knittting!

Next post, I’ll continue and talk about shawl knitting and mixing sheep breeds when knitting with handspun.  Stay tuned!!!!

All images and content copyright ©Martha Welland, 2015

Please credit spunplum.wordpress.com if sharing any images.


Grey and Spray

After the business of preparing to move house and going on holiday I’m finally finding time to wrap up my trio of posts about grey sheep and dying their wool.  For a refresher on earlier grey sheep adventures check out Beginning Adventures with Grey Sheep  and More Grey Sheep Love: Spinning with Gotland.

In my previous post, I talked about spinning up some grey Gotland top into a lace-weight single.  This time I’ll talk about spray dying it before plying, and also dying and spinning up a mid-grey Massam top.

Spray dying is fun and can be easily done outside, which is how I like to work.  Even in the rain, you can get a good dye job done, and I love feeling like the fresh air and the crisp Northern England damp are spun into my yarn.  It’s a little bit unpredictable, but since dying grey fleece is a bit unpredictable anyways, I don’t have a problem with this.

DSCF3088
The outdoors dye studio

Just like with handpainting and dying, I always start with a good long soak in vinegar and water.

 IMG_20151017_161532848 (1)

Pictured above is my Gotland single and my Massam top, bathing in vinegar and coordinating nicely with the slate gravel in my back garden.

Once the items have soaked for a good half hour to 45 minutes I hang them out on the washing line.  It’s good to let them drip for a little bit before applying the dye so that all of the dye doesn’t drip away.

DSCF3082
Wool in the garden, after being sprayed


With skeins I start spraying at the top and let the dye soak in and drip down before spraying in further down. With top, since it’s sort of slung over the line I concentrate the dye at the bottom of the loops and then work my way up.  DSCF3084

After applying the dye, I let it sit on the wool for about 45 minutes and then I carefully wrap it up in long sausages of cling film or plastic wrap, pop it into Ziploc bags, and steam it in a colander on the stove for about 45 minutes.   Then I let it cool a bit outside before unwrapping it into a sink of warm water, and letting any excess dye rinse away.

The thing about spraying when the wool is hanging is that you can’t separate the strands of yarn or fibres like you can when handpainting in a tray.  With grey fleece it’s even more of  a gamble because when wet, it’s so dark that it’s hard to tell where the colour is going.  My Gotland single was a complete mystery until it had been rinsed and dyed.


DSCF3078
The grey Gotland single looking like a tangled mess.  As it hangs and drips, it takes on a very light-coloured halo that makes identifying the colours very difficult.

DSCF3079


So on that note, I’ll talk more about the individual pieces that I dyed this time.  The Gotland single was a lovely soft grey all on its own.  However, I always intended on dying it as the next in my series of landscape-inspired yarns (for more on that, check out Landscape Yarns).  The colours were inspired by my drives through the Scottish Borders region.  I sprayed the skein with some olive green, a bit of yellow, and a dark forest green, and then dribbled on some of a terracotta colour from a squeeze bottle.

DSCF3069
Before
IMG_9776
After

The result was just as I had hoped, and captures the shifting greens and earthiness of the views from my drives down the M74 motorway.

IMG_9778

I should have left it as it was, but I went ahead with the original plan and chain plied it into a DK weight yarn. The result is pleasant and almost looks like a tweed yarn, but I think I prefer it the way it was as a single.   It was a good experiment, but I have some regrets, and I feel like the more dramatic colour shifts that I liked in the single were lost in the plying.

IMG_9811

The Massam top which I dyed the same day was my first time working with this breed of fleece.  In many ways it’s a lot like Gotland, but it’s a British sheep from the north, originally bred from a cross between Wensleydale and Swaledale breeds.  It’s soft, with long staples and a lovely halo.

DSCF3067
Massam top, showing off it’s lovely lustre and soft grey


Spray dying this was very quick.  With the natural grey as the base, I only used one main dye, and a few dribbles of a darker contrast blue and let the dripping of the wet top do the blending of colour for me.  I wanted to leave quite a bit of the grey showing since in the past I’ve gotten carried away with the spray bottles and the resulting top hasn’t had very much variegation.

DSCF3085

Above is the wet, dyed top, hanging on the line.  Below it’s all dried and fluffy.

IMG_9775IMG_9773

Spinning it was a proper pleasure because of the long staples and soft, lightweight texture.  I decided to leave it as a single because I was pleased with how the variation in blues turned out.IMG_9821

And that concludes my grey-sheep adventures so far.  Next I’m moving on to some lovely brown French merino and a lot of undyed raw alpaca fleece!

All images and content copyright ©Martha Welland, 2015

Please credit spunplum.wordpress.com if sharing any images.

Beginning Adventures with Grey Sheep

Dying grey wool is my newest love, so I thought I’d better write a post about my grey wool adventures so far.

The grey wool love started when I spun and dyed a couple of skeins of yarn for my friend Holl yas a thank-you for gifting me a pair of hand carders.  I used two corriedale tops, a grey and a white, and plied them together before spray dying them.  This was also my first time spray dying, and it was very successful.

11755138_10102607284433380_6842394211280427959_n
Lovely grey corriedale, hanging out on my lazy Kate, all ready to be plied.
IMG_9440
Grey and white corriedale yarn being spray dyed on the washing line. It was a rainy day, so I had to use a bin bag to shelter it while the dye soaked in.

The result was lovely, and I loved how the colours variegated with the different colours of wool.  It also felt like a lovely way to celebrate the natural beauty of the fleece.  Corriedale is a a lovely soft fleece with a nice lustre to it.  Also, the white corriedale is not a pure white like some merino. I liked it for variegated dying because the colours fade more gently than when dying over a stark bright white.

IMG_9448
The finished product.
White corriedale plied with grey corriedale, spray dyed after plying

I was so pleased with how the grey wool created variation in the colour, that I went on to experiment some more…

Grey BFL 2-ply,with slubs of merino felt, and handpainted
IMG_9477
Colour detail of grey handpainted BFL

The above yarn was my first time handpainting a completely grey yarn.  The colours were unpredictable but the end result was lovely.  Although I used about 4 different colours on the one skein, it doesn’t feel like the natural grey is overpowered.

Grey merino plied with white merino, handpainted after plying.

The above merino skein is a favourite.  The white merino top was lightly dyed to be a pale yellow before it was spun, and plied with a grey merino single.  In painting it, my hope was that the yellow base would help to brighten the greens, while the grey ply would create some nice variations in the blues.

I had spun merino, and blue faced Leicester before, and now I’m looking forward to trying out other different breeds of grey sheep!  For more, stay tuned to the next post.!  If you’re interested in grey fleece and different sheep breeds, check out A Weekend with the Oldest Sheep in England

All images and content copyright ©Martha Welland, 2015

Please credit spunplum.wordpress.com if sharing any images.

A Weekend with the Oldest Sheep in England

I had a very productive weekend and finished a lovely new yarn that was a small triumph because I’ve been doing a lot of experimenting with using this kind of fleece and have had mixed results so far.IMG_20151004_114021797

This is kettle dyed merino cross (from Clive the pet sheep), spun from the fold and plied with undyed coloured ryeland.

Ryeland has beautiful natural grey variegation, resists felting, and has a hard-wearing, cobwebby texture.   It’s also the oldest breed of sheep in England which makes me feel like I’m spinning with a little bit of history every time I use it.  My ryeland fleece came from a farm up in Aberdeen.

ryeland-ewe
A ryeland sheep Photo credit: http://www.accidentalsmallholder.net
11406779_10102526423948440_7646664279941741787_n
Raw ryeland fleece

However, while beautifully textured, it’s not very soft.  So I like to ply it with something super-soft, like merino so that I can achieve the best of both worlds: natural beauty and texture with super soft wearability.IMG_9651

Above is the ryeland single, pre-plying.  It was spun from the fold and has incredible self striping. All of this variation from the same sheep!

It’s taken a lot of experimenting with this fleece to figure out how best to use it.  I love it, but the yarn that I’ve spun and knitted with that was 100% ryeland turned out to be not so pleasant to wear.

IMG_9466

IMG_9474

Above are early experiments with 100% ryeland, spun from the fold and then handpainted  Because this wool resists felting, dyeing can be kind of fun because you can rub the dye in and the wring it out in places. However, the yarn has a very springy texture to it, and was difficult to knit with.  I knit these skeins into a shawl, along with other handspun, but after about a month I found that the shawl had gradually shrunk, or rather had retracted, as the ryeland yarn slowly sprang back from how the knitting had, evidently, stretched it.

And so the experiments continue.  My recent success is encouraging, as it’s soft enough to wear and still celebrates the natural beauty that is this weird and wonderful wool.  I still have almost half a kilo of fleece left in my stash, so I’m looking forward to spinning future yarns with it!

Like grey fleece?  Check out Beginning Adventures with Grey Sheep

All images and content copyright ©Martha Welland, 2015

Please credit spunplum.wordpress.com if sharing any images.

Processing Raw Fleece: Part 2

So now you’re ready to get the fleece into the tub.  I like to use plastic baskets that you can get from the pound shop or dollar store.  You don’t need the lids.  If you want to spend more you could also use the sifting trays that insert into cat litter trays.  I can wash 300-400g of fleece at a time in three baskets in my bathtub.  As I mentioned before, how much I wash is determined by how much drying space I have.  I set aside a couple of hours to soak the fleece.  I do a minimum of three soaks at about 30minutes each.

IMG_20150803_125959184

Run the tub full of hot water (not scorching or boiling).  Place the fleece in your baskets, and when the tub is full and the water is off, submerge the baskets in the water.  The fleece will start to float, so gently, gently place your hands on the fleece and submerge the locks.  Don’t agitate them, squash them down to hard, swoosh the baskets around, etc.  If you aren’t using baskets, you can just put the fleece straight into the tub, but it will be harder later on to remove them without agitating them.

IMG_9311.JPG

Don’t be alarmed by the amount of oil that comes off the fleece right away.  The water will turn orange pretty quickly.  This is just the lanolin separating from the locks.

To the left is a picture of  yarn spun ‘in the grease’ from unwashed merino, soaking in the sink with a bit of soap. This photo is a bit unsavoury, but you can see how dark and orange-y the water is.

Leave the fleece to soak in the water for about 30 minutes.  Don’t let the water get cold, or else the oil will congeal back onto the fleece.  When the time is up, lift the baskets out and drain them well.  Don’t squeeze the fleece!  Drain the tub, give it a rinse, and fill it again with hot water and dish soap.  Put the baskets of fleece back in and let them soak in the soapy water for another 30 minutes.

IMG_20150607_162829217
Ryeland fleece in the tub

After the soap soak is over, drain the baskets as before, drain and rinse the tub and fill it again with clean water for a final soak.  If the soapy water is still yellow, or the fleece still looks dirty, then you can do another soak with soap.

After the final soak, drain the baskets and gently pick up the fleece to let all the water drip off.  Lay the locks on a towel, lay another towel on top, and gently press out extra water.  You can skip this towel step if you like, but your fleece will take a lot longer to dry.

IMG_9661 (1)

And now you should have a lovely big batch of clean, fluffy fleece!

Air dry the fleece in whatever way is convenient.  If it’s a sunny day I put it outside.  I also like to lay a piece of muslin cloth or netting overtop of my drying rack before I put the fleece on it.  When it’s dry, you can trim off any dirty bits that remain, although most of these will dust away  when you start handling the fleece.  Don’t card, comb, or spin your fleece until it’s dry!

Finally, don’t forget to give your tub a wash.  Whomever you live with will thank you for it.  It will be a bit gritty and sludgy after everything is finished and those who aren’t radically enthusiastic about fleece will find this a bit off-putting when they go to take a shower the next morning.

Happy washing and stay tuned for future posts about carding, combing and spinning from the fold.

All images and content copyright ©Martha Welland, 2015

Please credit spunplum.wordpress.com if sharing any images.

Processing Raw Fleece: Part 1

So here we go!

This is what a bag full of raw merino cross looks like.    Lovely creamy colour….IMG_9601

But quite dirty in places

IMG_9603

The first thing I do is trim off all the caked and dirty ends.  If your fleece supplier has already done this for you, then you’re a step ahead, although do have a look through the locks to take out anything they may have missed.

IMG_9611

When I started washing fleece I was hesitant to trim off too much because I didn’t want anything to go to waste.  However, it meant that I was just dealing with the dirty tips later down the line, and in some cases inadvertently felted the fleece by trying to pick off the dirt when it was soaking.   Going through lock by lock also means that I can pick out any large pieces of vegetation which will inevitably be tangled in the fleece.  Sometimes I come across beautiful little surprises like this dried up flower bud.

IMG_9613

Through the whole process you’ll do yourself a favour if you keep your locks of fleece laying in the same direction as neatly as possible.  Trimming is the most labour-intensive part of preparing your fleece,but take the time to keep your fleece organised and it will be easier to dry and spin later on.

It may feel like you’re trimming off a lot, but what is discarded is actually in fairly small ratio to what goes into the tub.  Here is a picture of fleece ready to wash ( about 300 grams raw) with everything that was trimmed off, to show the proportion of waste.

IMG_9631

Now the fleece is ready for the tub!  A word of warning before closing this post….

IMG_9625IMG_9618

Cats really like raw fleece.  They like to lick it, roll in it, kneed it, smell it obsessively, etc.    It must be the sheep-y smell (I don’t think I mentioned that raw fleece smells VERY sheep-y and lanolin-y.  I love it, but check with whomever you share a house with before you start filling your spare rooms with bags of it like I’ve done).  My cats go crazy for the fleece, almost like it’s catnip.  Keep your stack of neatly trimmed locks away from the kitties, and make sure they can’t leap into your storage bags!

Continue the raw fleece adventure in the next post….. Processing Raw Fleece: Part 2

All images and content copyright ©Martha Welland, 2015

Please credit spunplum.wordpress.com if sharing any images.

Processing Raw Fleece: Intro

Processing raw fleece is time consuming, but not labour intensive.  At the bare minimum all you need is a bathtub or sink, some dish soap, somewhere to dry the fleece, and a few hours at home to mind the fleece as it soaks.  Other materials that will help:  two or three plastic baskets (I bought mine from the pound shop); a towel that you don’t mind getting dirty and a bit wooly; mesh cloth, muslin, or netting to lay over your drying rack

I did a lot of online research about the best way to wash fleece when I got started. Some ways worked better than others, and in the end I found a method that worked best for me and the fleece that I was using.  The only thing that you must not do is agitate the fleece, as it will felt, and probably quicker thank you think.

So this is a step by step of how I turned raw merino cross fleece in to fluffy, spin-able, super soft wool.

IMG_20150530_112534190
Before and after: raw, greasy locks straight from the sheep, and washed, hand-combed top from the same batch of fleece

Continue the raw fleece adventure in the next post….. Processing Raw Fleece: Part 1

All images and content copyright ©Martha Welland, 2015

Please credit spunplum.wordpress.com if sharing any images.

From Fleece to Yarn…

This is my favourite way of working and is also how I learned to spin.  Working from a raw fleece allows you to be involved in every step of the process and to see the transformation of wool from fleece locks, directly off the sheep, to yarn that’s ready to knit or weave.  My first handspun knitting project was particularly special because I was able to knit, and now frequently wear, the wool from a sheep that I had actually met (and cuddled).  I feel that it’s important to know where our products come from and to be able to appreciate their natural properties.

2015_0621_13475700
My first handspun knitting project: The yoke uses my first two successful skeins of hand-dyed handspun merino cross from a pet sheep named Clive.

The downside is that it’s time consuming and much more difficult to produce a yarn with a consistent gauge.  Raw fleece will contain dirt, pills of felt and vegetation, and sometimes the fibres will be too tangled to spin smoothly.  As a hand spinner using raw fleece, I sometimes like to spin textured yarns that incorporate the felted and tangled bundles that you find in the locks of a fleece.  But sometimes it’s nice to spin smooth, knit-able, and more hard-wearing yarn.  That’s why I do like to buy commercially combed tops to spin more consistent yarn, to try out different types of fleece, and to save some time and effort.

IMG_9665
Three skeins spun from raw fleece. They’re fluffy and more textured than commercially combed fleece would yield. The skein on the far right has big granny stacks of partially felted fleece locks.
IMG_9555
A single of hand-painted yarn, spun from hand-combed merino cross fleece.

I usually get my fleeces from Ebay, where farmers will often sell partial fleeces, weighing around only 1 kg (better for storage).  These are unwashed, but often the worst of the dung and mud will have been trimmed off.  You can also find fleece sellers on Ravelry.  I almost bought an entire Border Leicester fleece for only £30 from a Raveller this past spring.   Sometimes sourcing fleece like this also allows you to experiment with breeds of sheep that you can’t get as combed top.  I’ve been working my way through an interesting coloured ryeland fleece, which is primarily a meat breed but has a multi-tonal wool with an interesting cobwebby texture that resists felting.

Always store your fleece in something breathable, like old cotton pillowcases, or paper bags (I made extra big ones out of a role of brown newsprint paper).  Raw fleece is very oily, and if left sealed in plastic, it will sweat and the oils will eventually go rancid and rot the wool.

IMG_9651
Coloured ryeland on the spinning wheel. This is the oldest breed of sheep in the UK!

Next up… posts about the whole process of raw fleece to spinning wheel!

Check out: Processing Raw Fleece: Intro,  Processing Raw Fleece: Part 1, and Processing Raw Fleece: Part 2

All images and content copyright ©Martha Welland, 2015

Please credit spunplum.wordpress.com if sharing any images.